MOZA Aircross S is available now >>


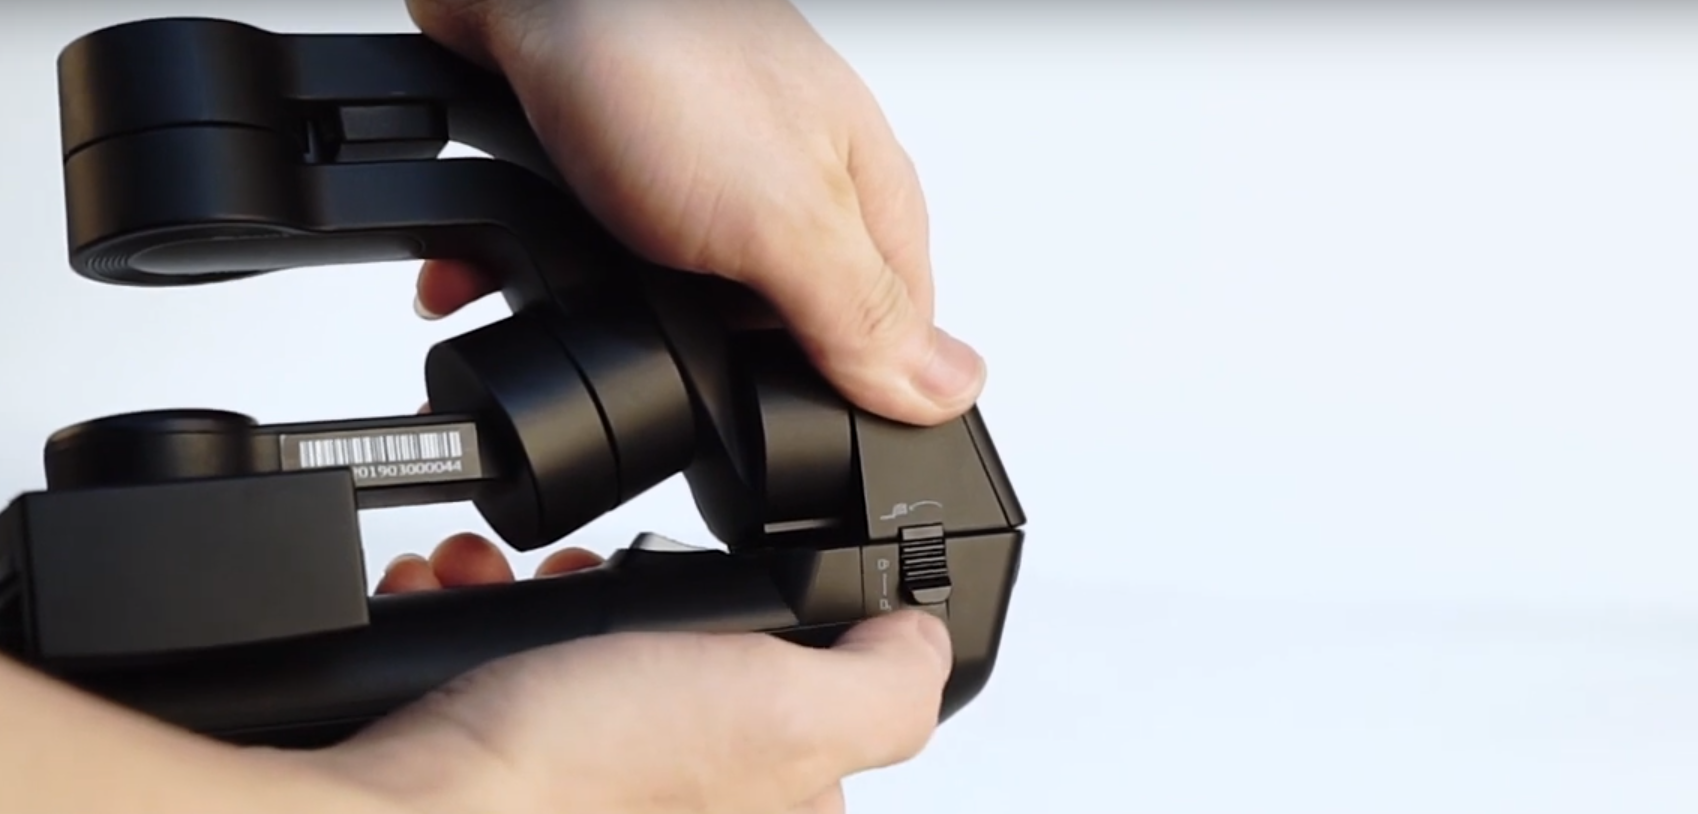
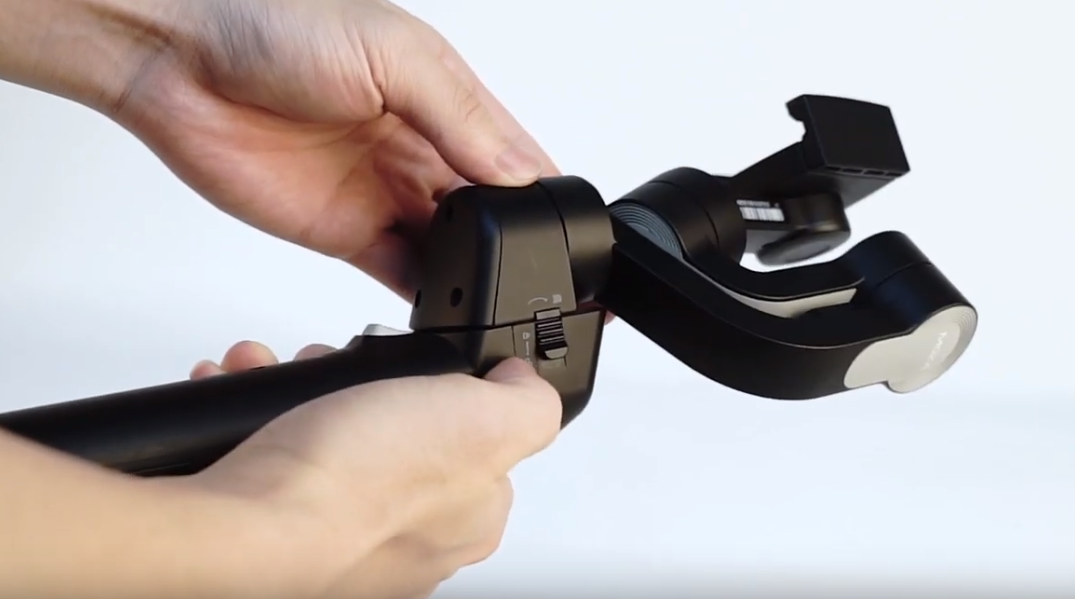
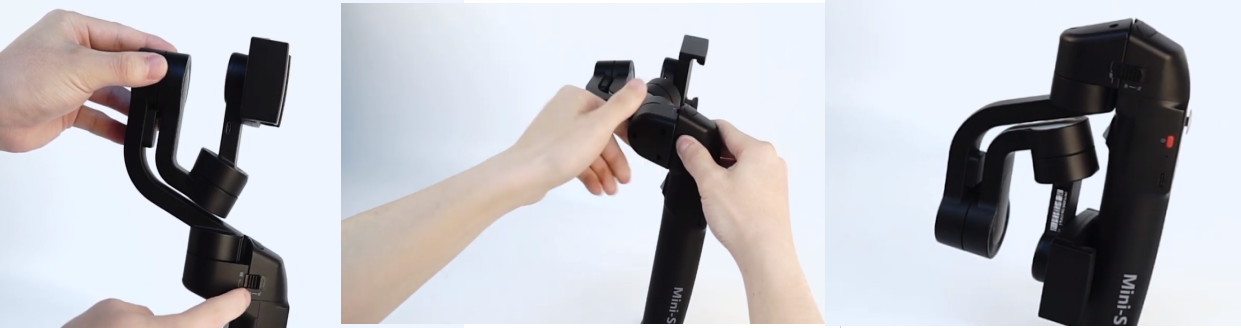
Slide the lock to the right, then turn the gimbal part outwards to expand the Mini-S.
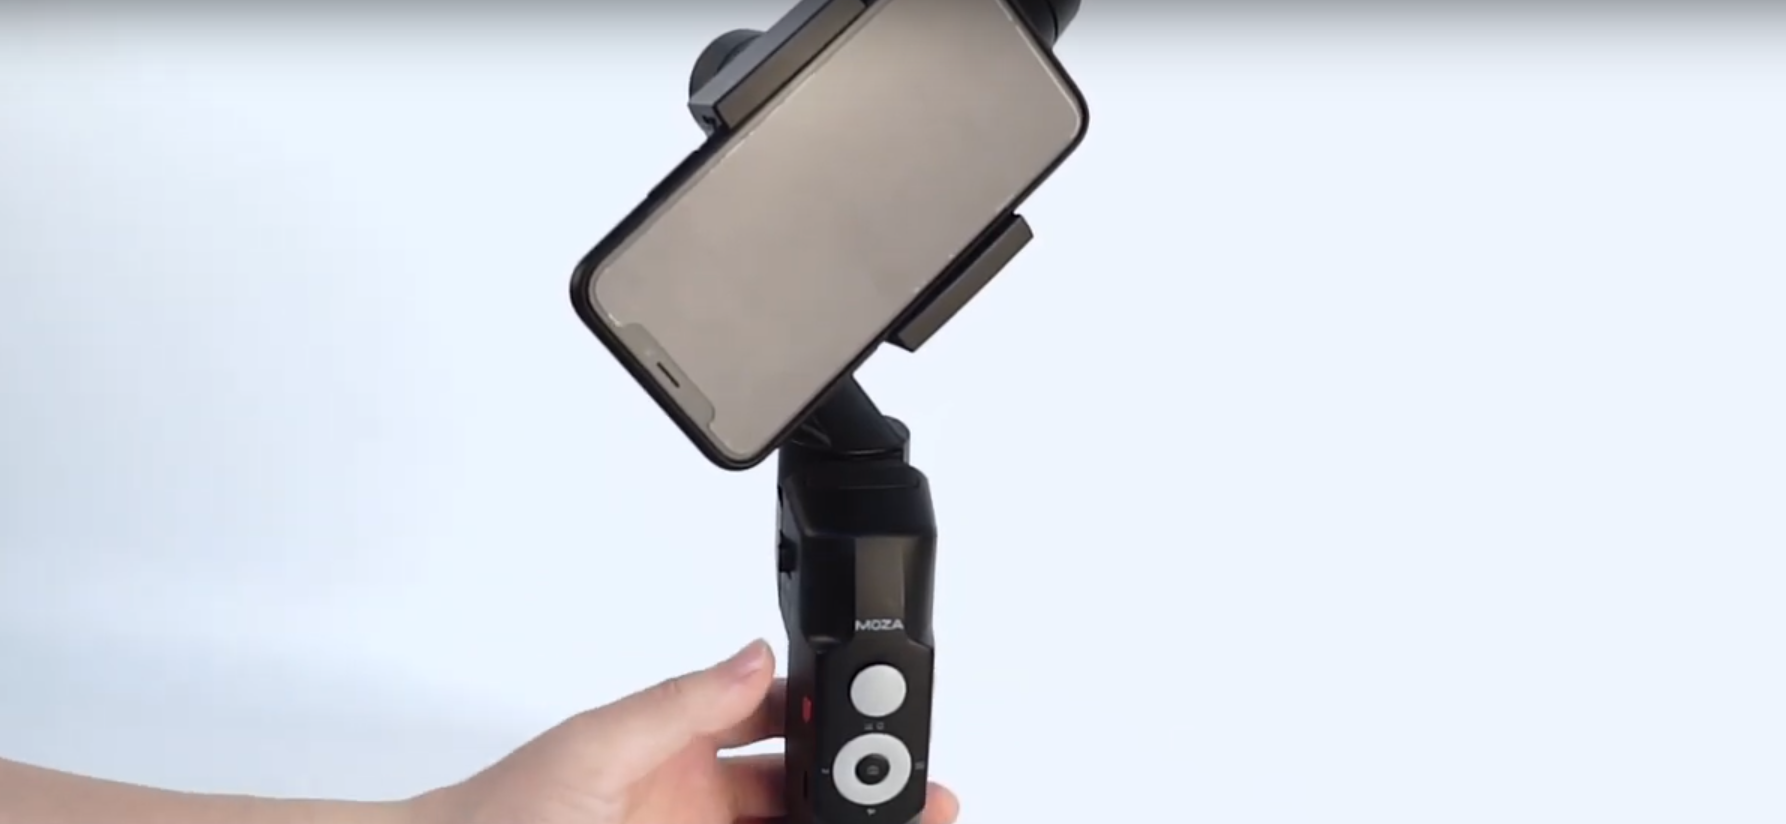
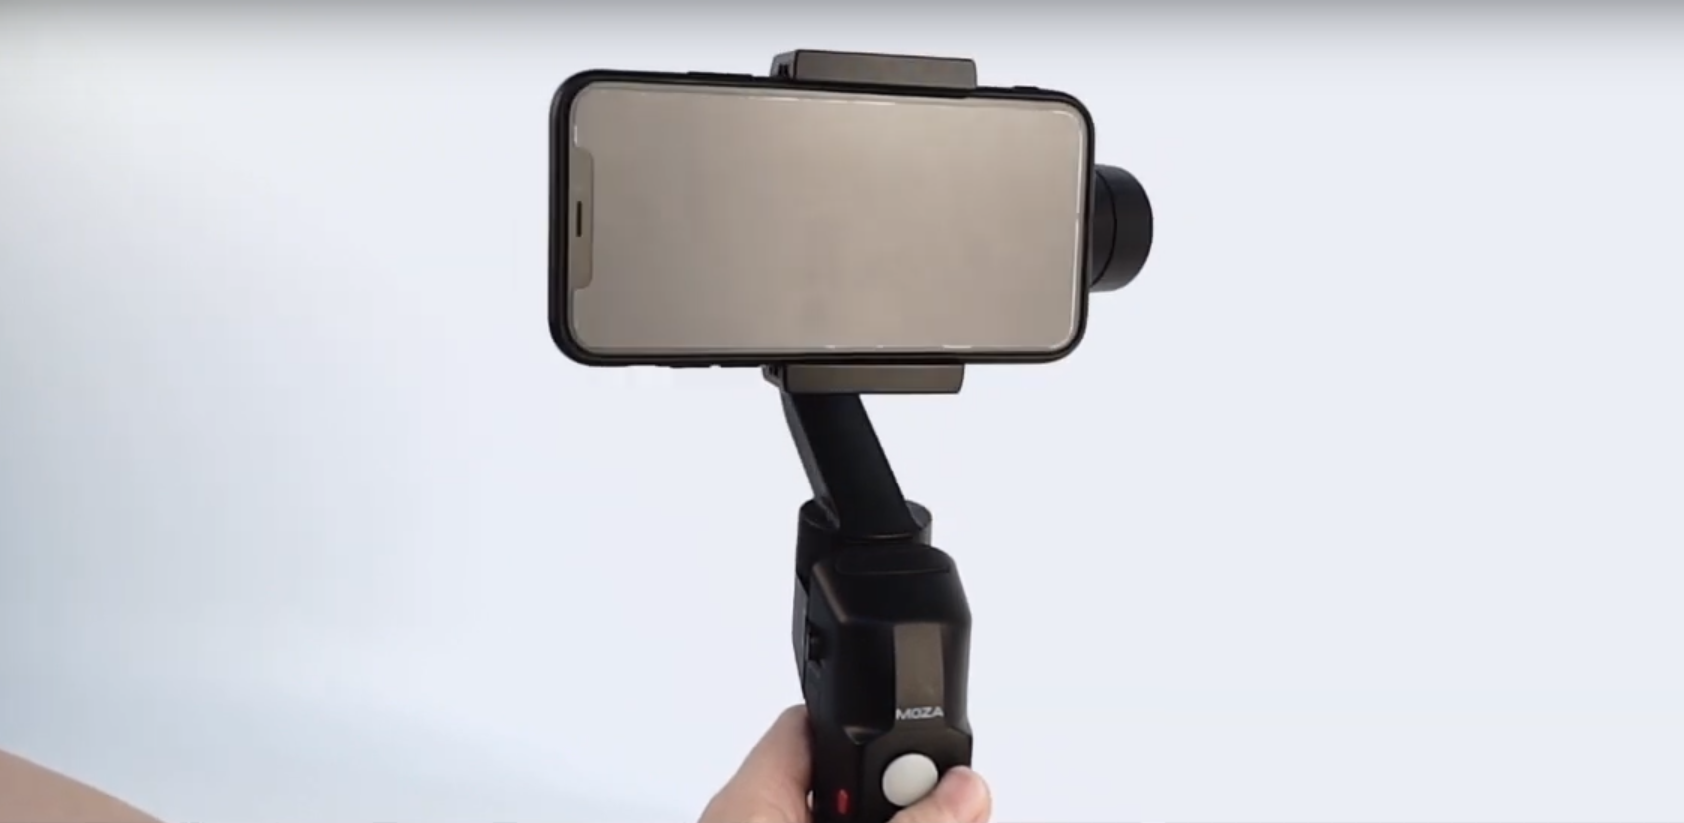
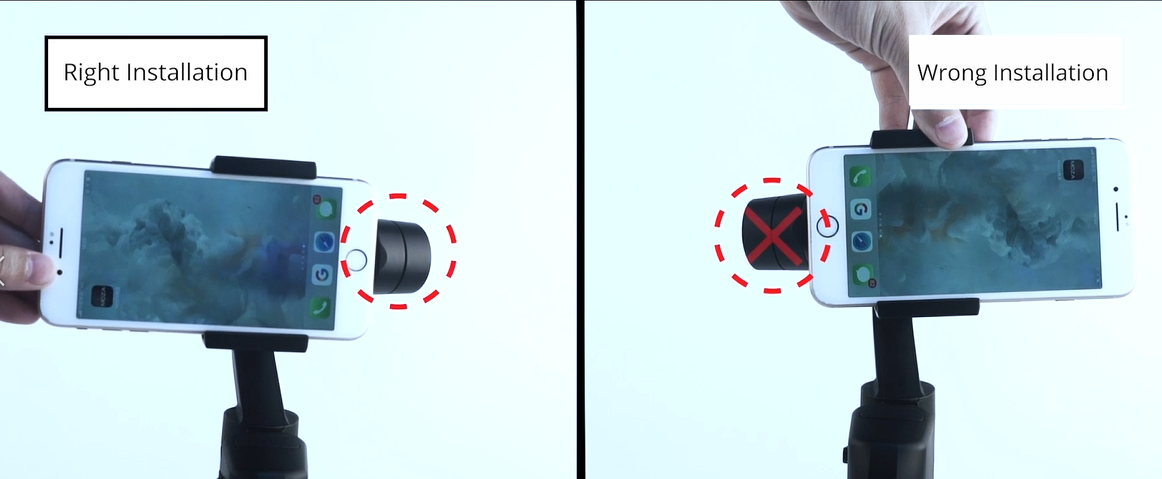
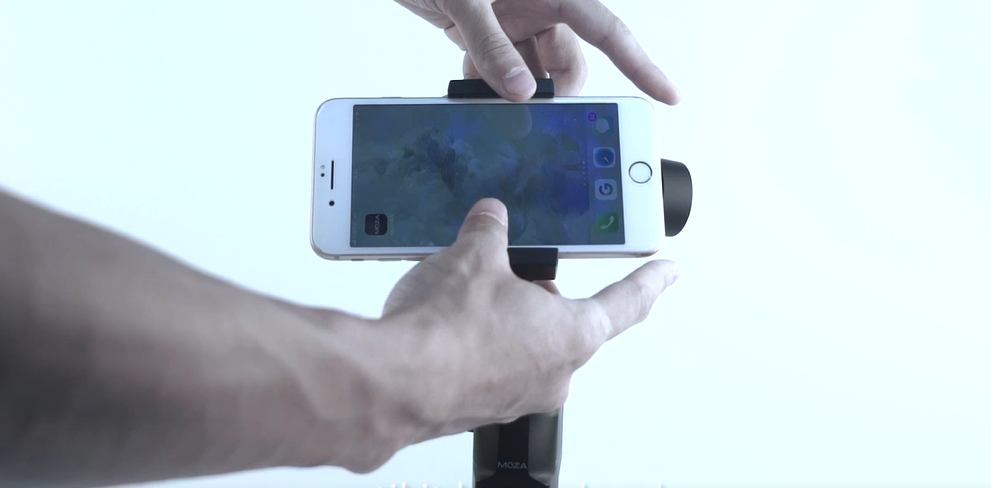
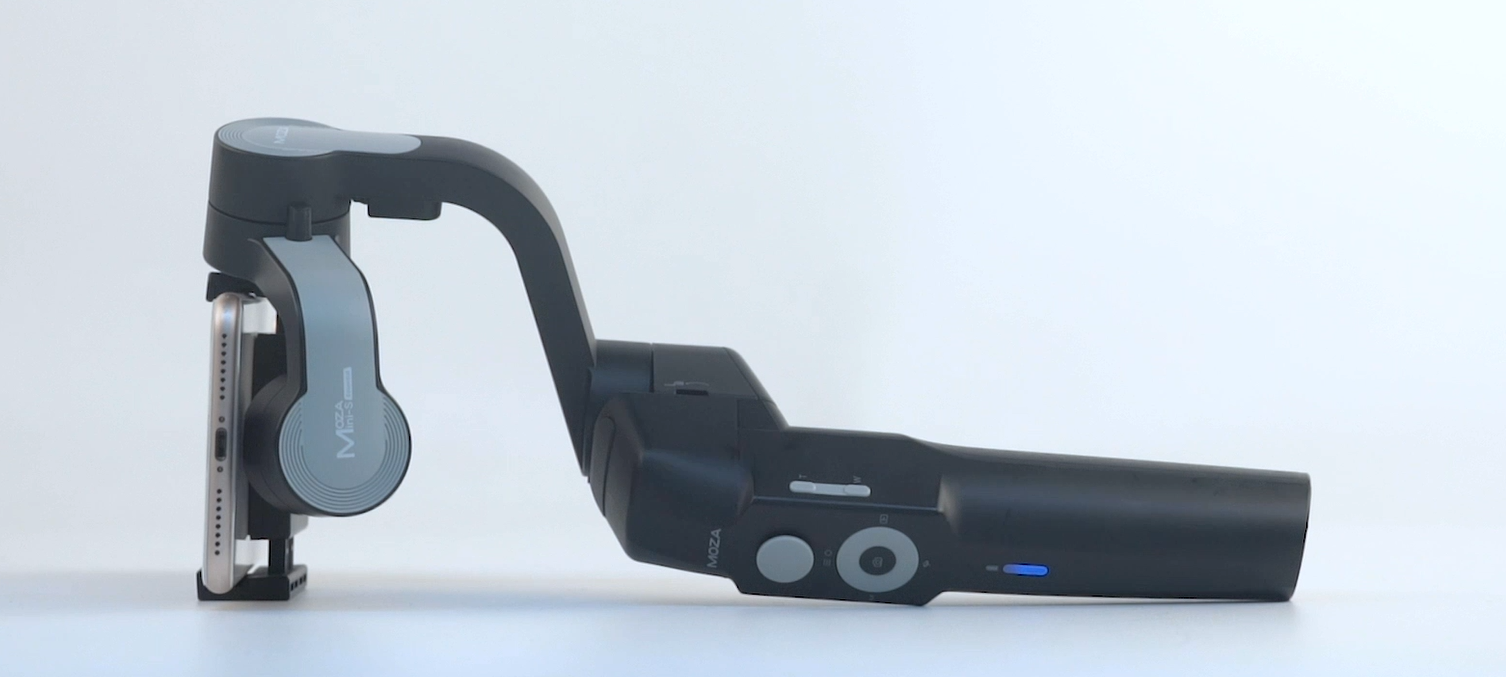
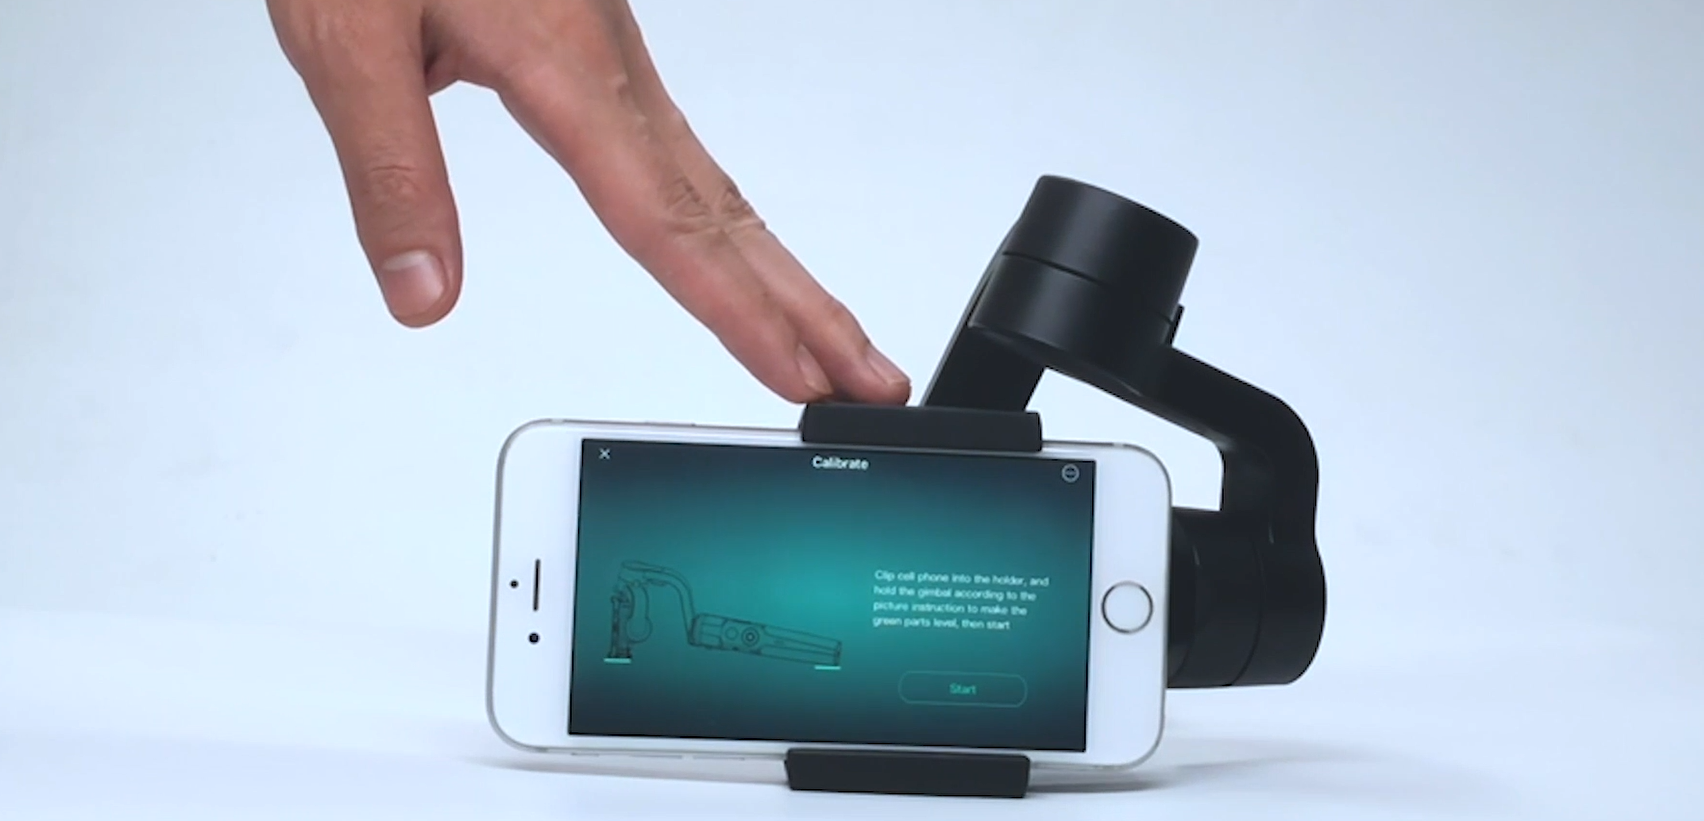
Open the phone holder from the right and place the mobile phone into the holder.
Move the mobile phone leftwards or rightwards until it keeps level. If it is left-heavy, move it rightwards; If it is right-heavy, move it leftwards.
Please note that the tilt motor should be on the right side.

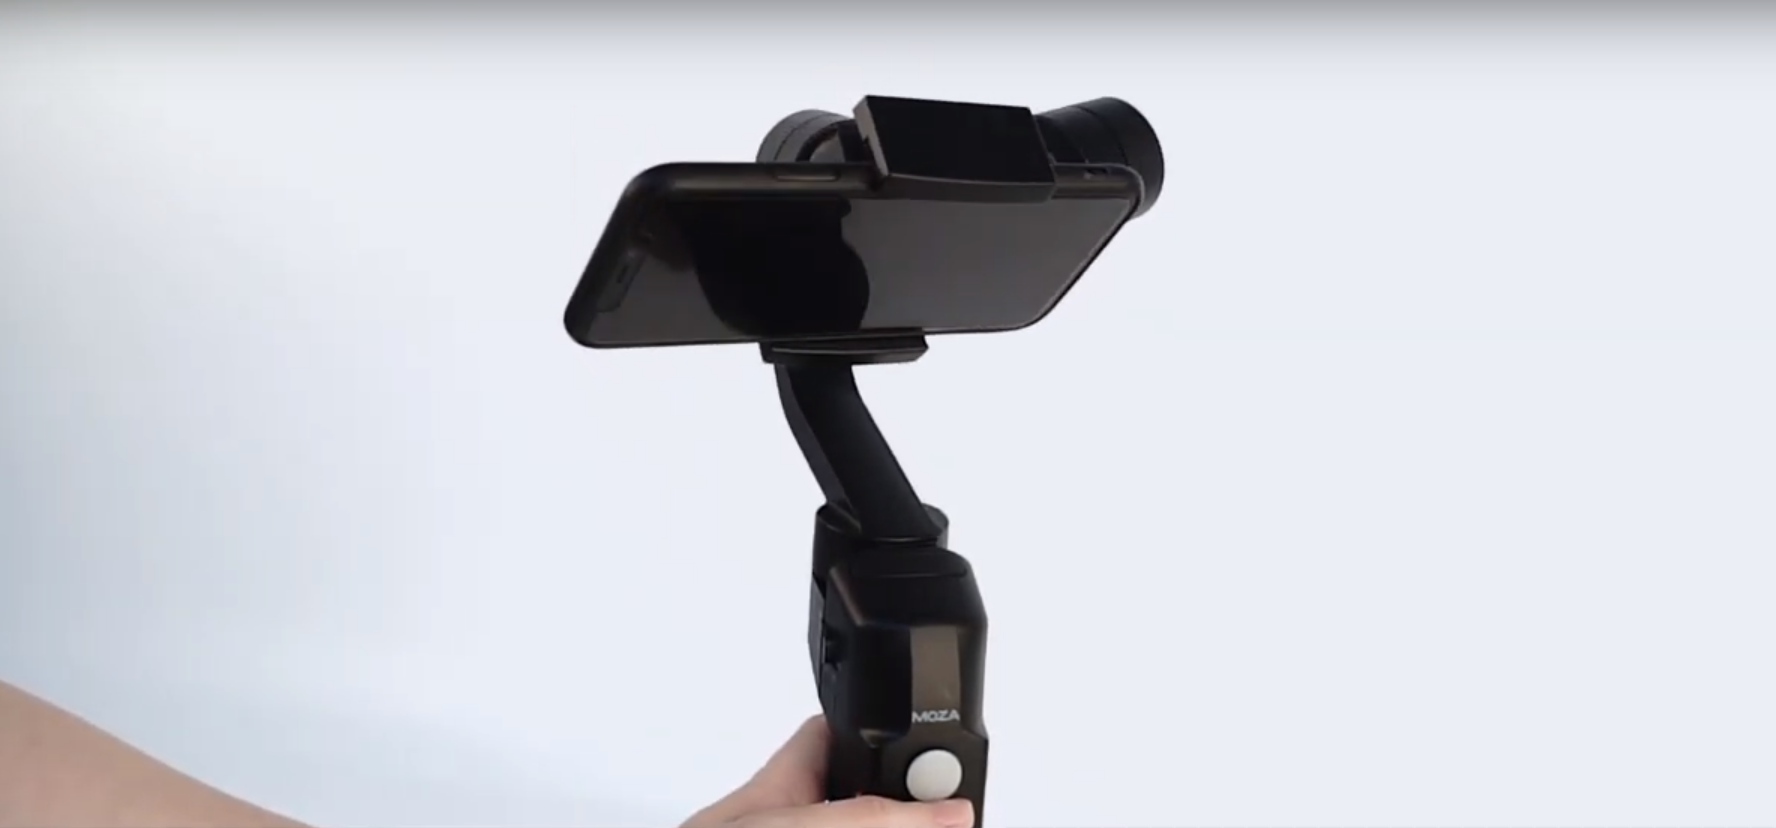
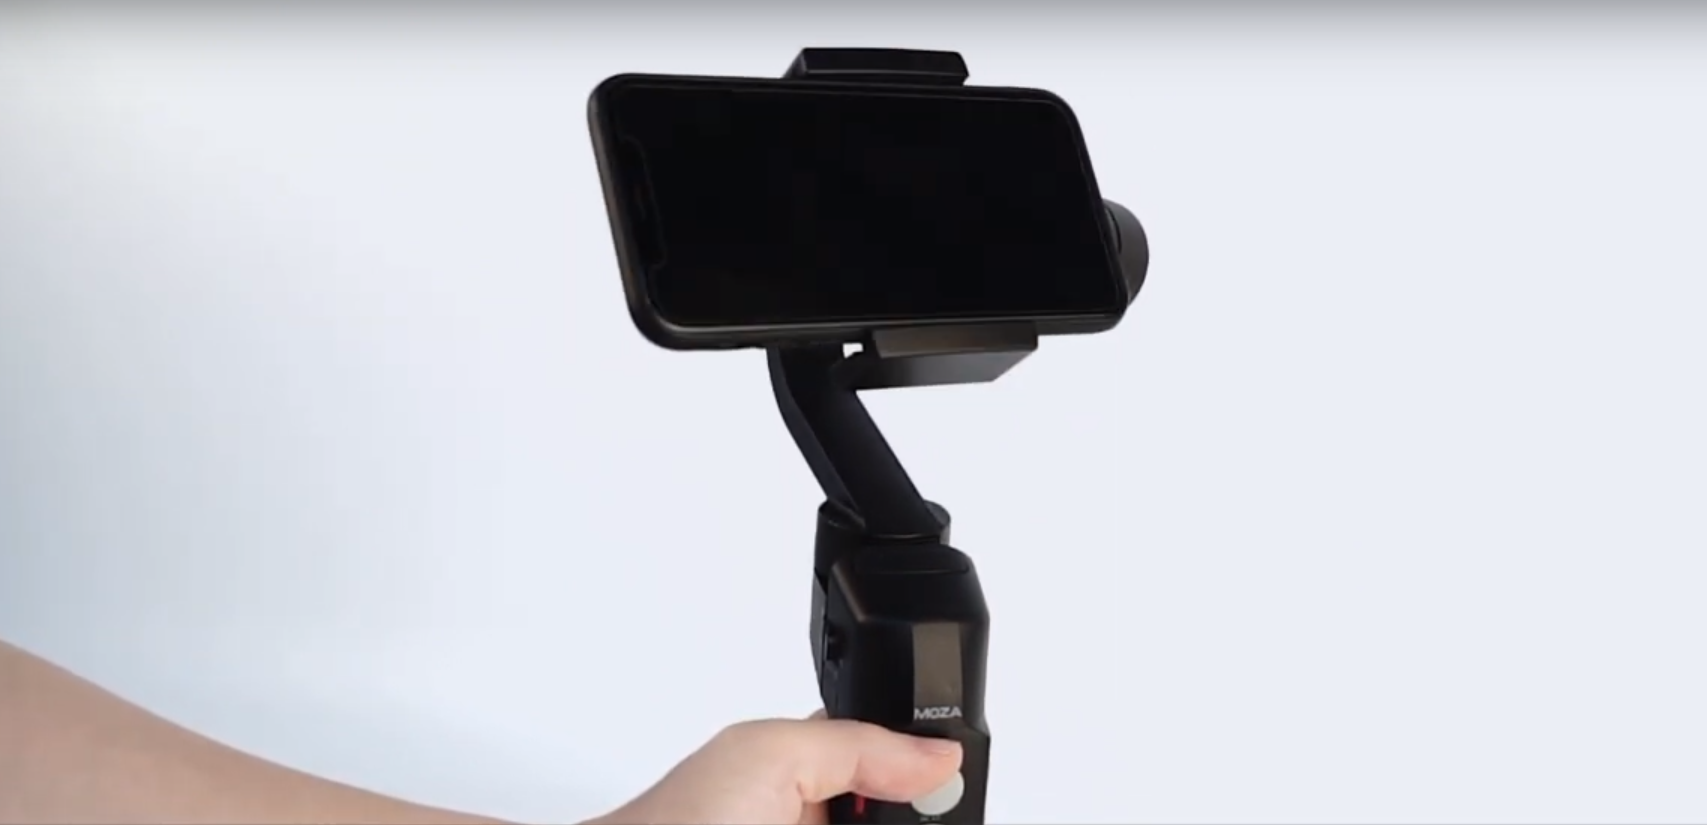
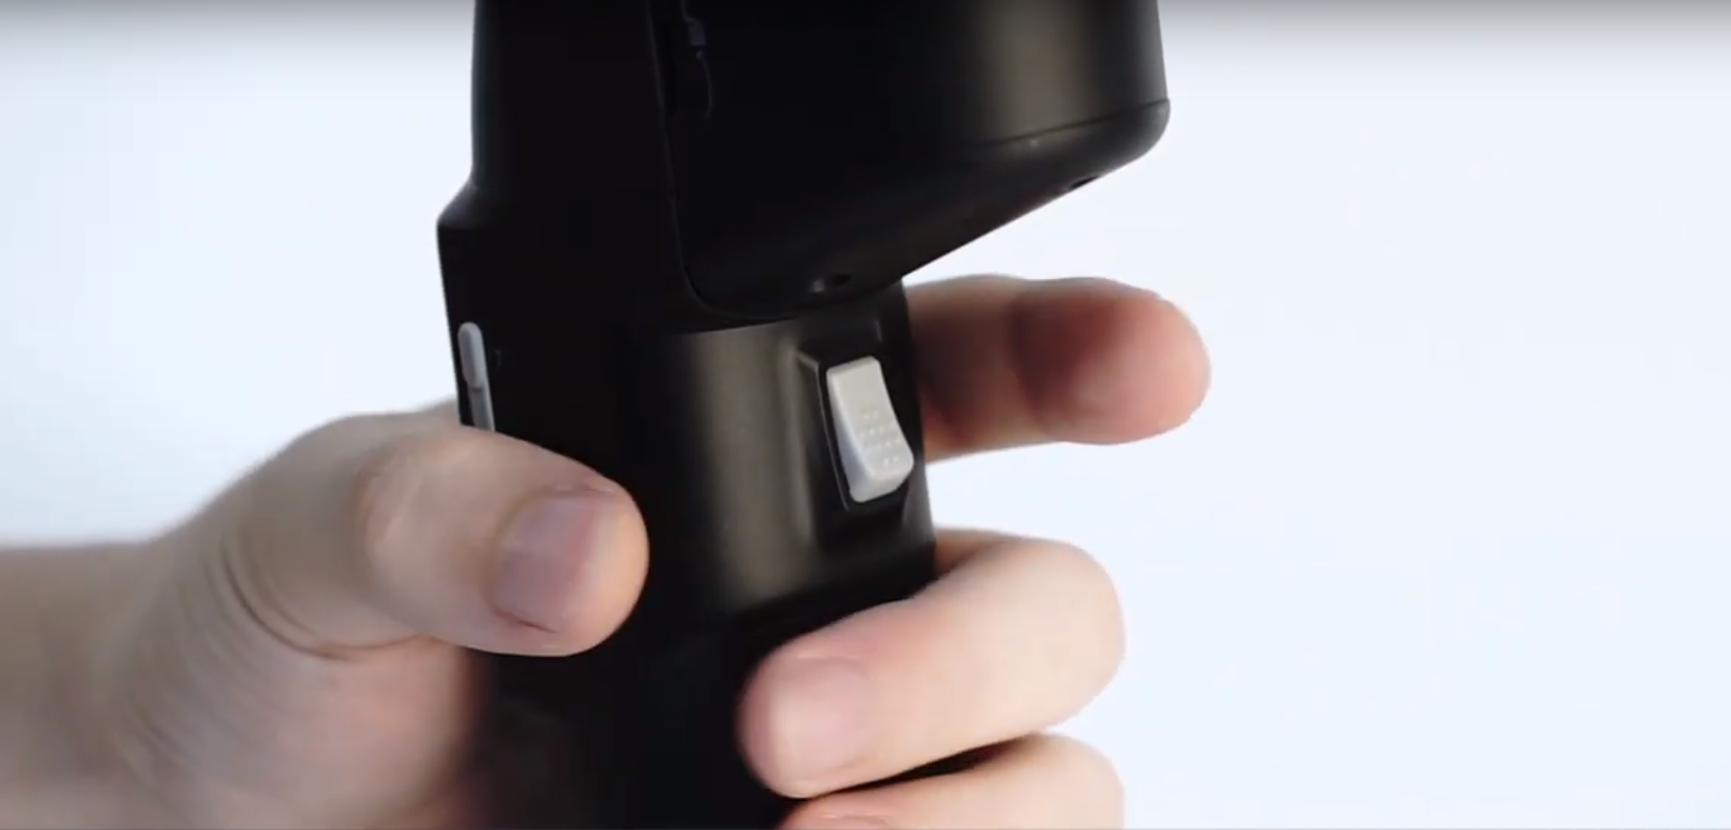
Then, power on the Mini-S by long pressing the red power button; Long press it again to power off the gimbal. Short press the power button to make it standby, then short press it again to wake it up.
There is a lock on the roll axis. When you need to fold the Mini-S, rotate the upper part clockwise to lock the roll arm.
Align the flat part on the pan motor with the front of the handle.
Fully slide the lock to the right, rotate the gimbal part inwards till the lock secures.
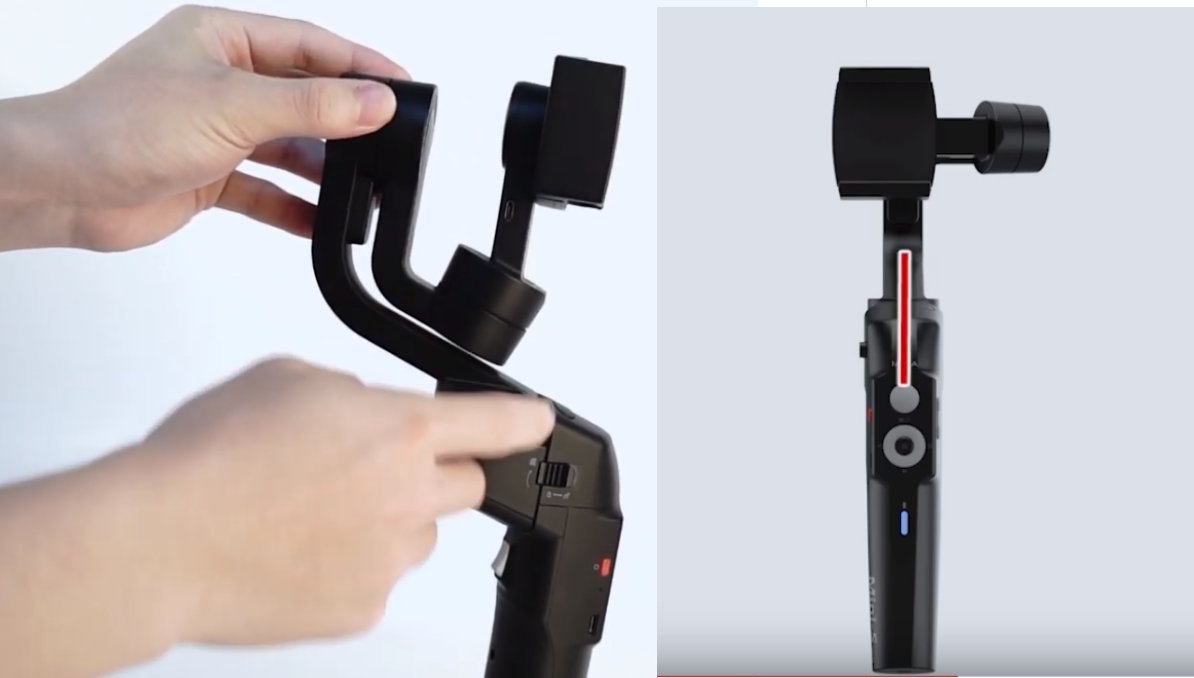
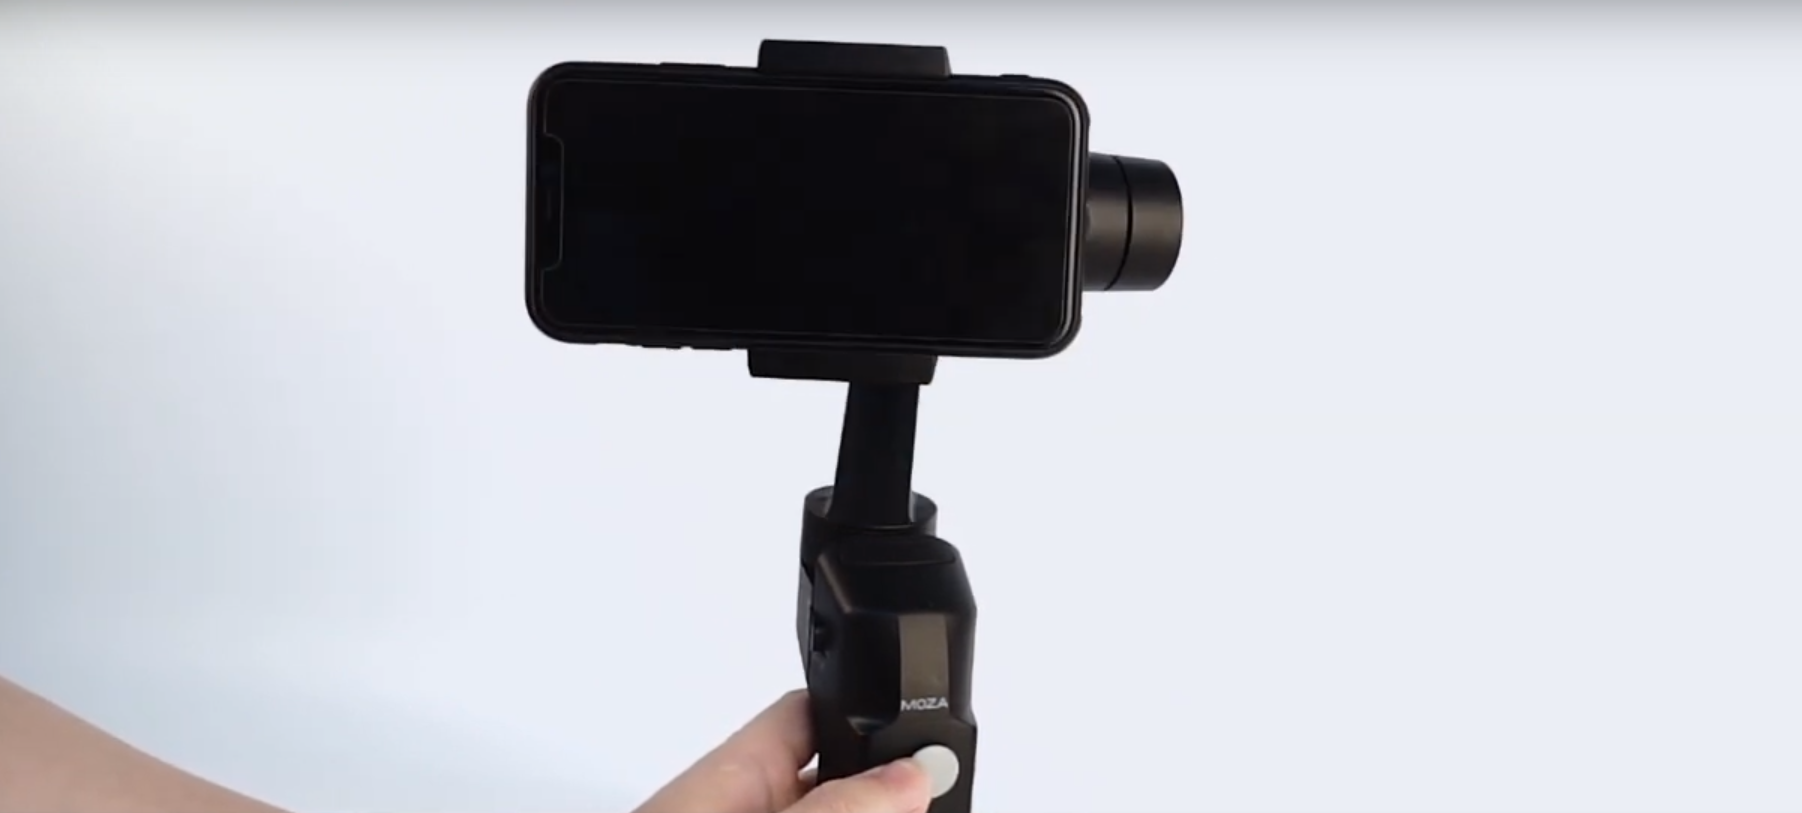
Hold the roll arm and rotate the phone holder 90°clockwise. Now the Mini-S is in portrait mode.

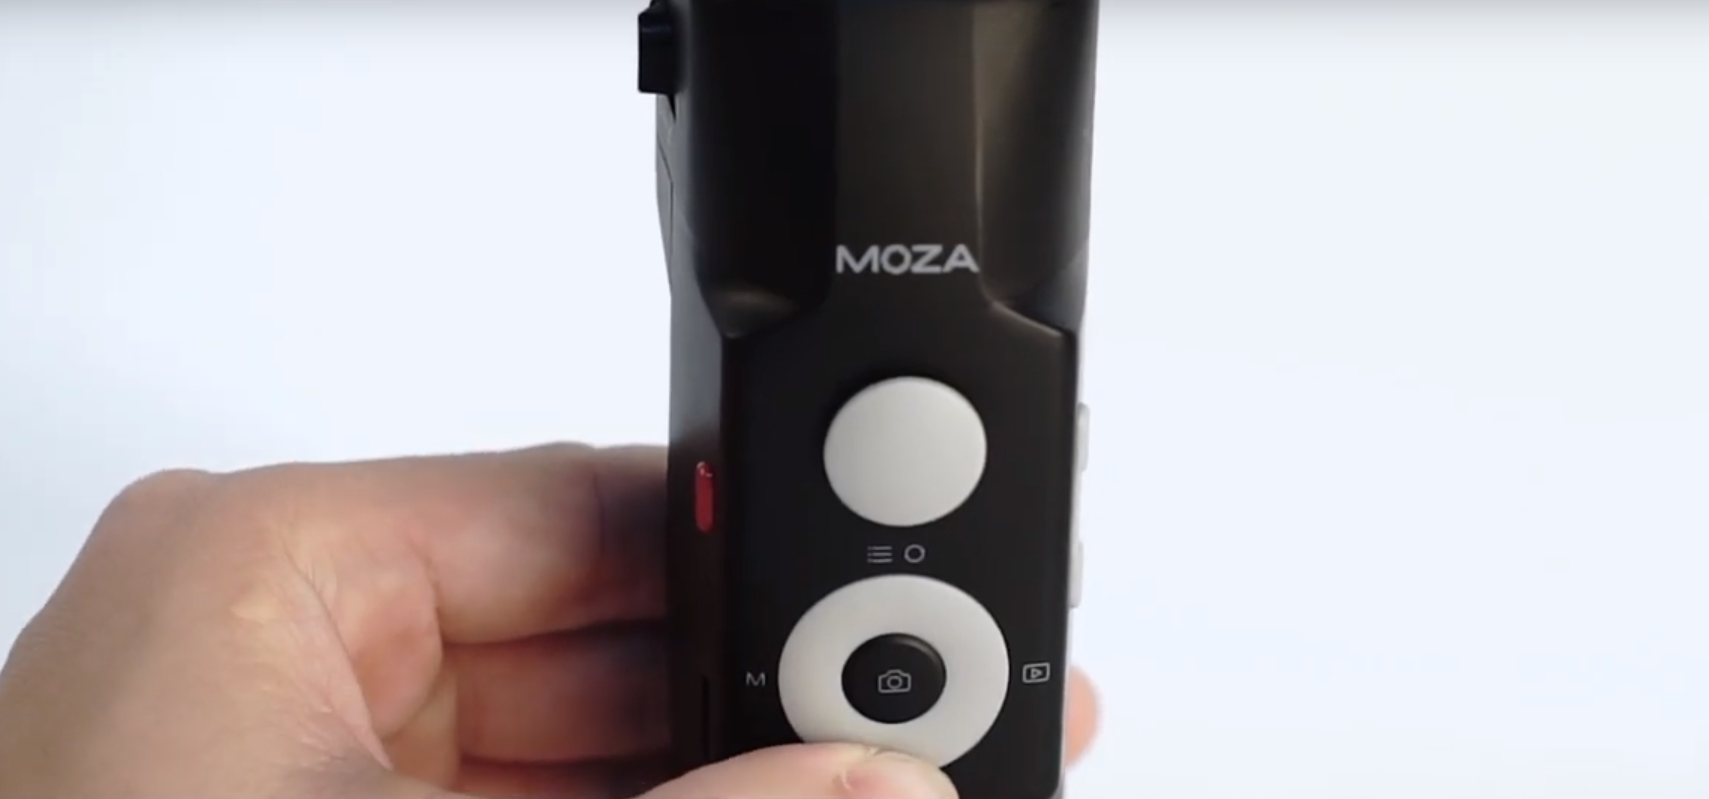
Smartphone gimbal has 3 axes in general.
Pan axis will do left and right movement horizontally;
Roll axis will do clock-like movement;
Tilt axis will do up and down movement.
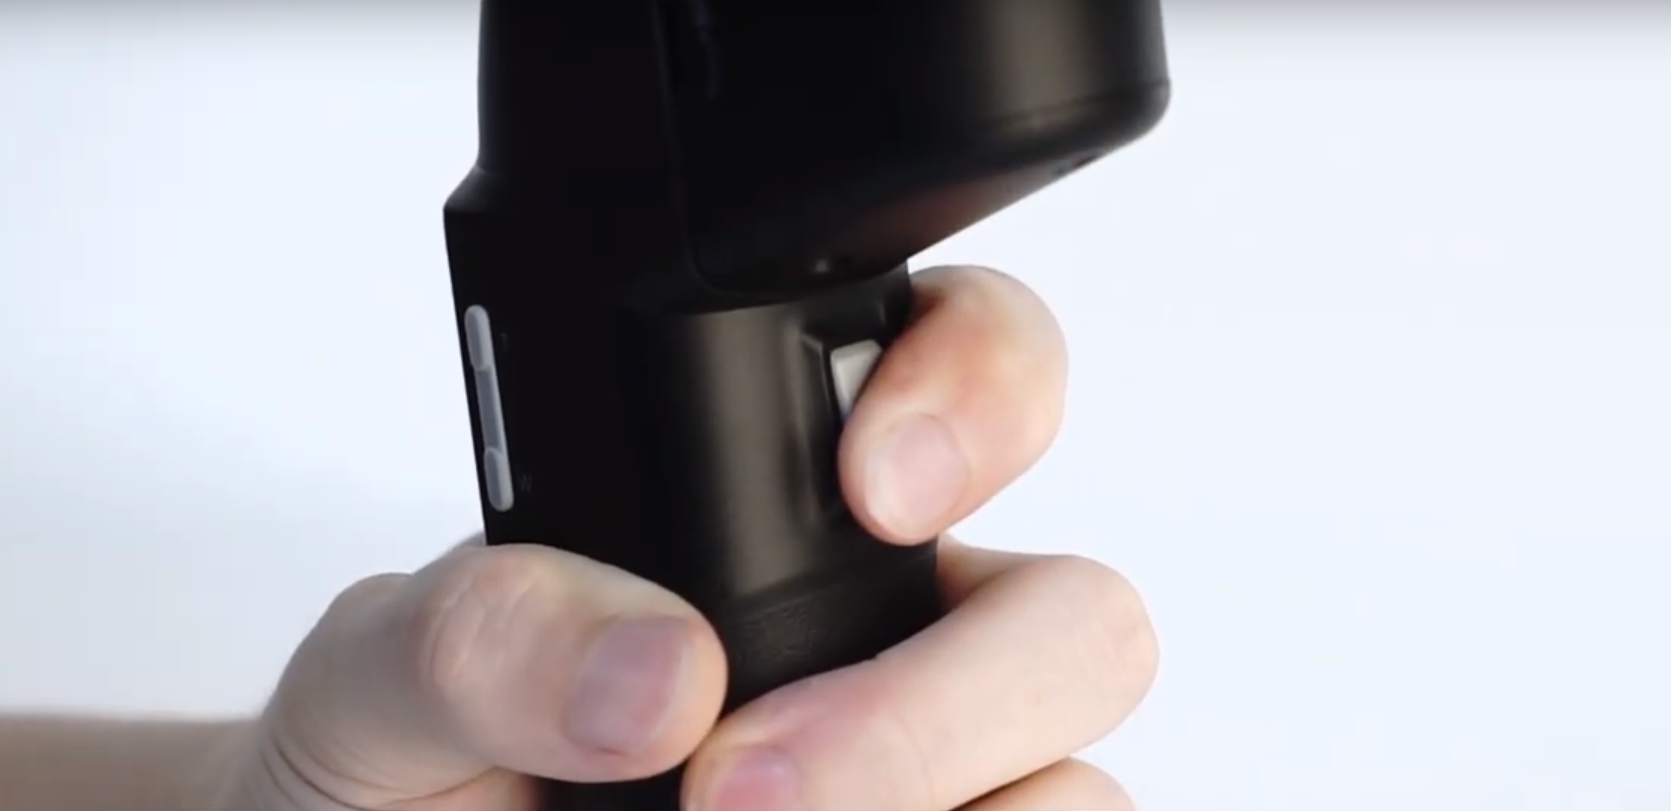
Move the joystick upwards, the phone camera turns upwards.
Move the joystick downwards, the phone camera turns downwards.
Move the joystick rightwards, the phone camera turns rightwards.
Move the joystick leftwards, the phone camera turns leftwards.
The faster you move the joystick, the faster your mobile phone turns.
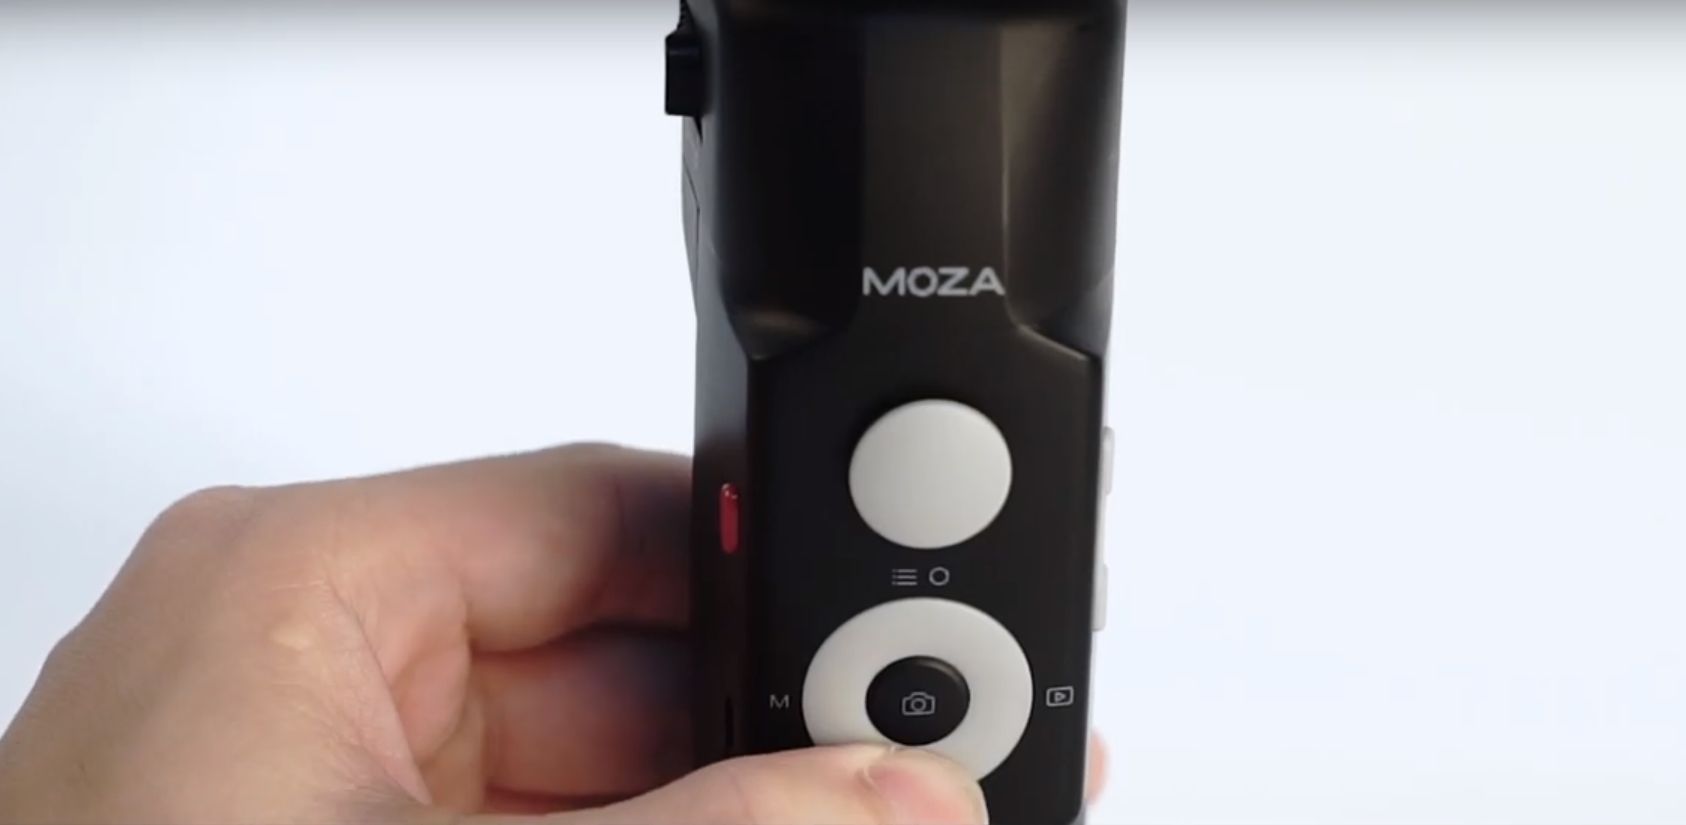
Pan follow mode: the gimbal is in pan follow mode by default.
The mobile phone follows in the horizontal direction. And it keeps still in the pitch angle.
Tilt follow mode: Hold the trigger, the gimbal enters the tilt follow mode.
The mobile phone follows in the pitch direction, release the trigger to exit.
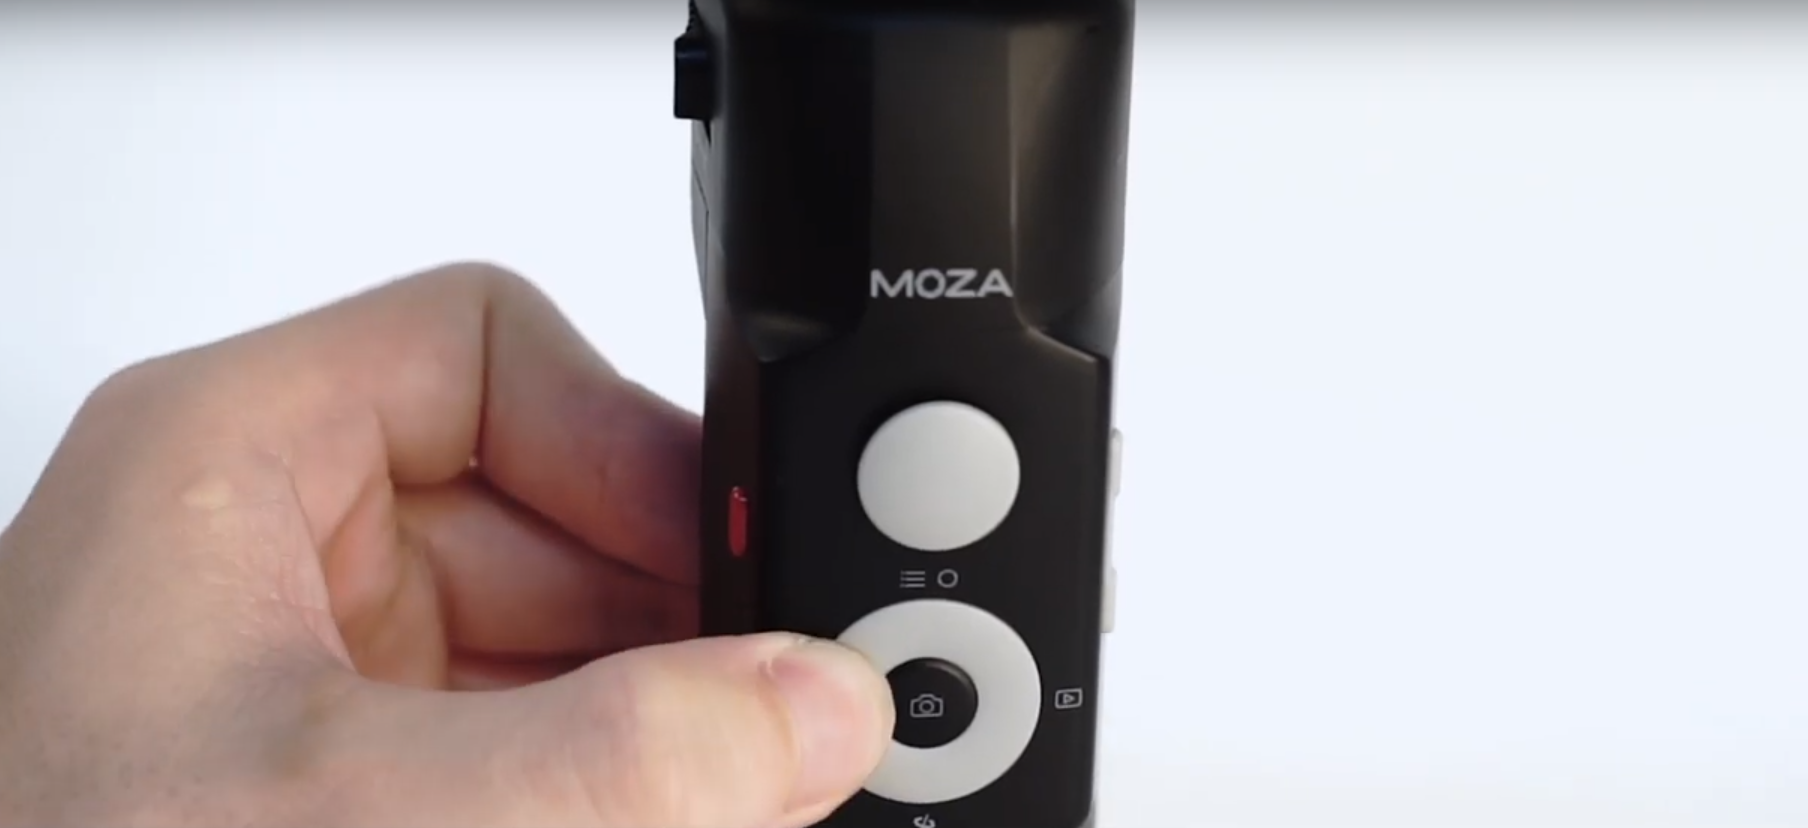
Roll follow mode/FPV mode: click the left button twice to enter the FPV mode.
The mobile phone follows in the roll direction at a max angle of 90°. Click twice again to exit.
All-locked mode: press twice and hold the trigger to enter the all-locked mode.
Three axes are locked. The mobile phone doesn't follow the gimbal movement. Release the trigger to exit.
Sport Gear Mode:click the down button twice to enter the sport gear mode.
The mobile phone follows very fast in the horizontal direction. Click twice again to exit.
Inception mode: Click the down button three times, and the gimbal enters the inception mode.
Move the joystick leftwards or rightwards to rotate the mobile phone. The faster you move the joystick, the faster your mobile phone rotates.
Double press the trigger to re-center.
Primary calibration is needed when the gimbal pan axis drifts to the left or right slowly in static state.
Place the phone into the holder. Please note that the tilt motor should be on the right side.
Move the mobile phone leftwards or rightwards until it keeps level.
Turn on the Bluetooth; Unlock screen portrait orientation mode; Launch the MOZA Genie App.
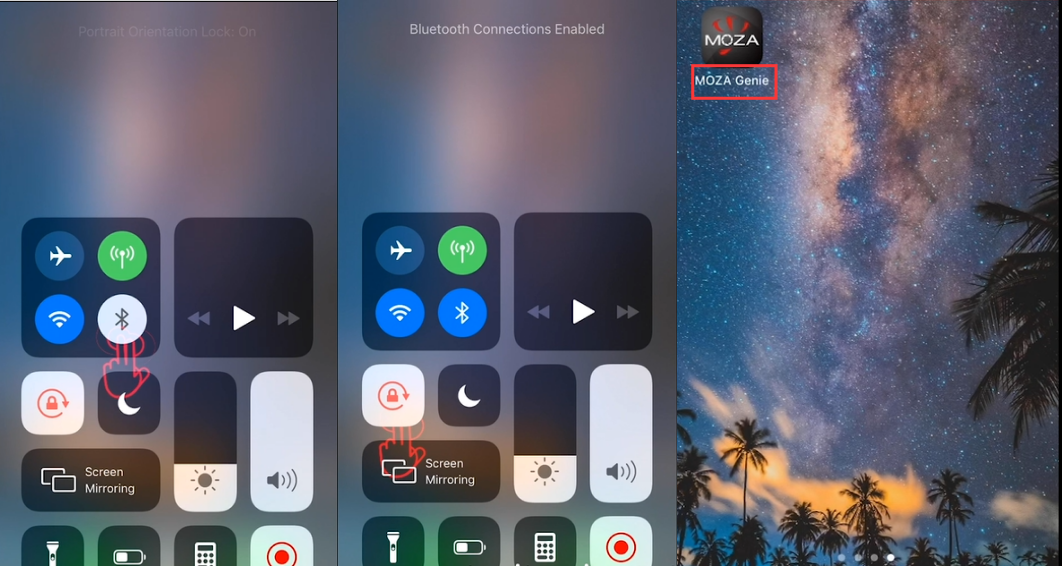
Click the Bluetooth icon; Connect the device.
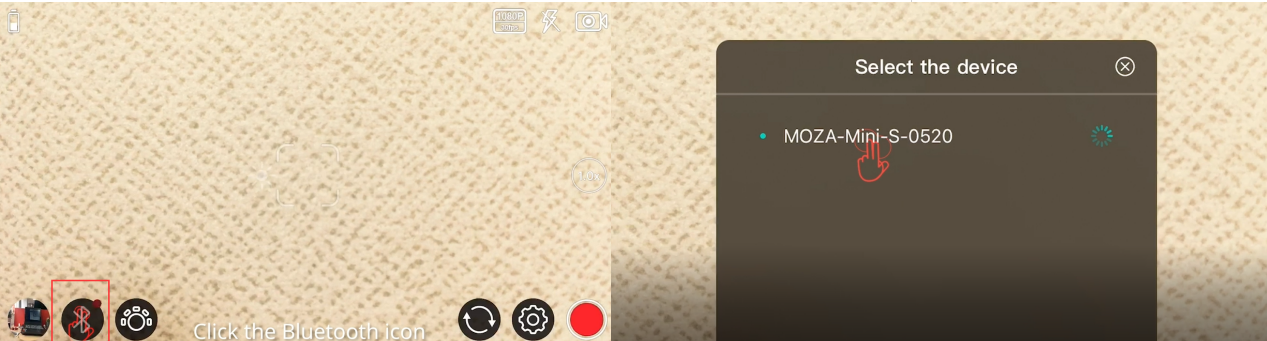
Now, the MOZA Mini-S gimbal is ready for calibration.
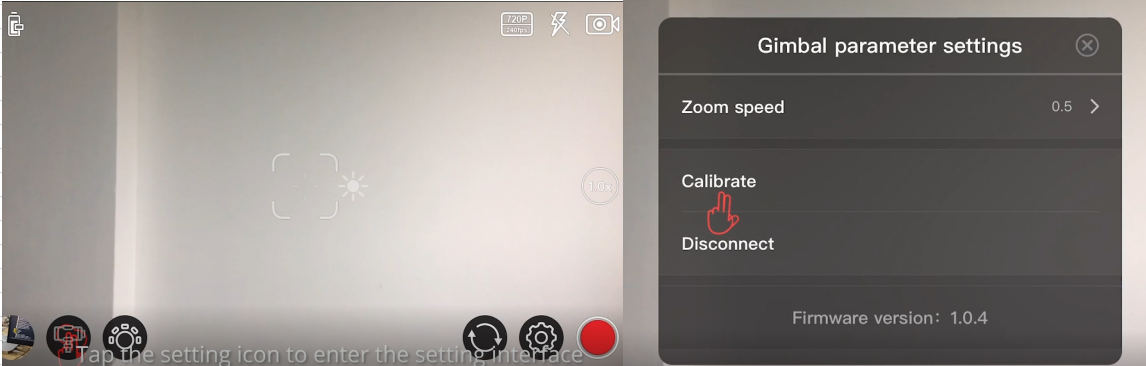
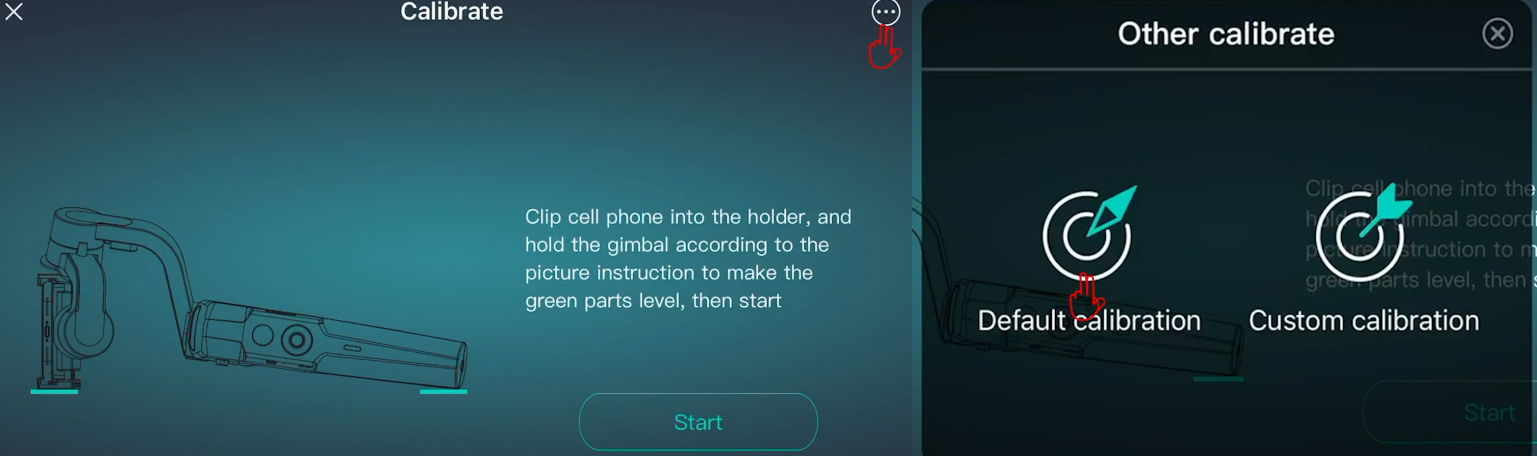
Tap the setting icon to enter the setting interface; Click "Calibrate" to start the calibration.
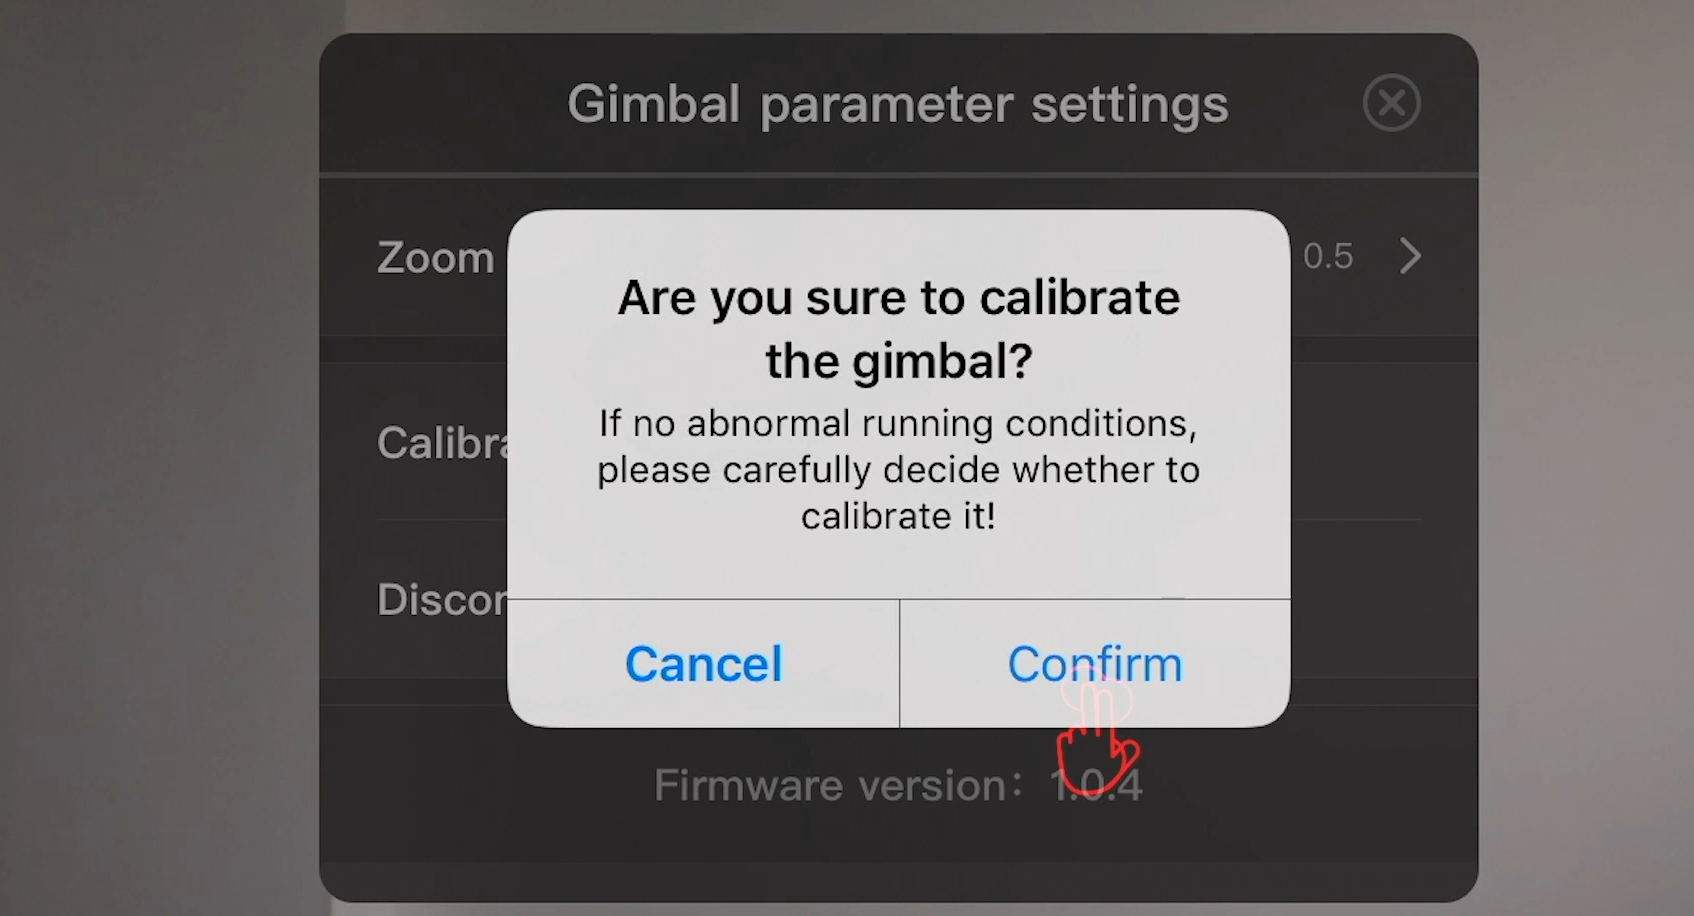
If there is no abnormal situation with the gimbal, please carefully decide whether to calibrate the gimbal.
Click “Confirm” to enter the calibration interface. Then the gimbal enters the sleep mode.
Then the gimbal enters the sleep mode.
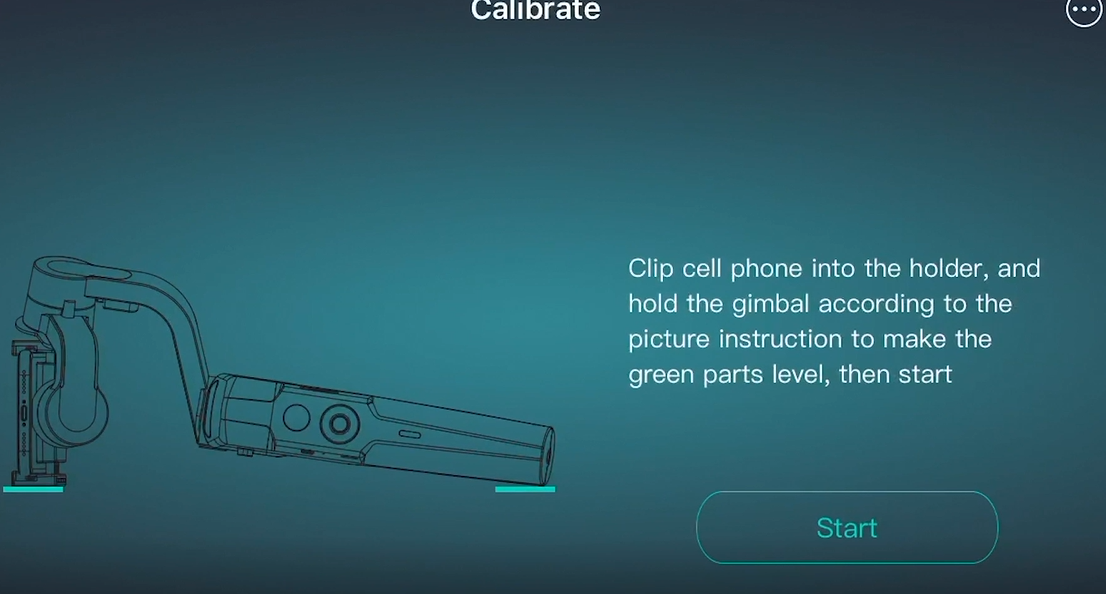
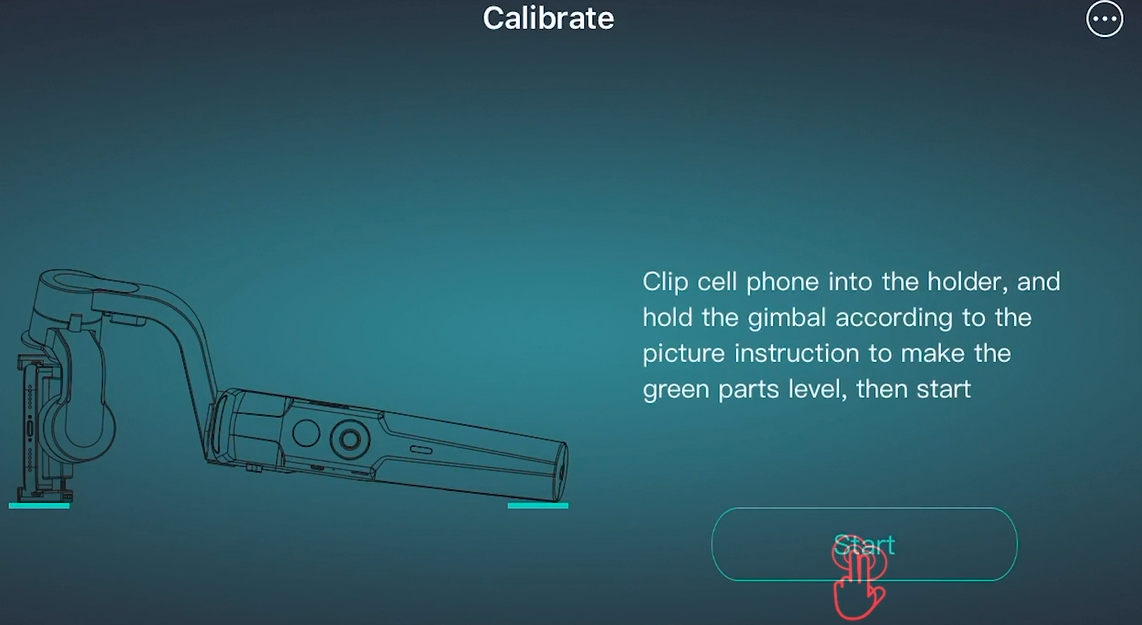
Place the gimbal and phone according to the on-screen instructions.
Please make sure to place the gimbal on a flat surface, such as a flat desktop, otherwise the calibration will be affected. And ensure that the bottom of the phone holder fully fits onto the desk.
You can slightly press the top of the phone holder.
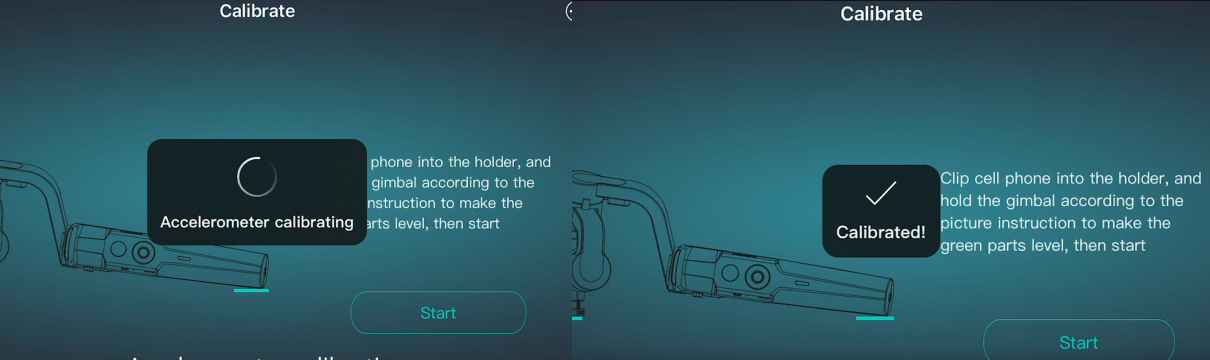
Click "Start" to begin the calibration.
For iOS system, “Gyro calibrating”, “Calibrated!”, “Accelerometer calibrating”, “Calibrated” will appear on the screen in sequence.
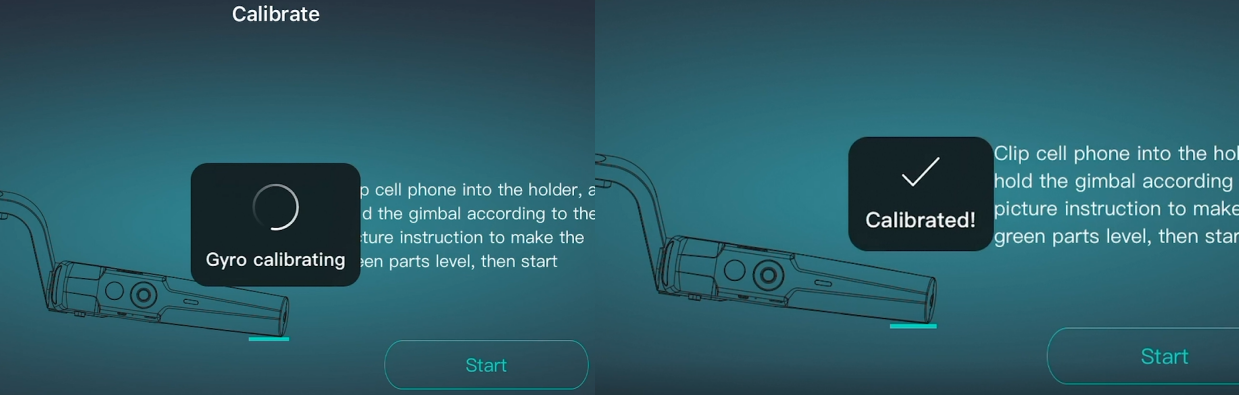
For the Android, “Calibrating”, “Calibrated” will appear on the screen.

Now, the primary calibration has been done.
Advanced calibration is needed when the gimbal runs abnormally such as random drift or rotation. Attach the gimbal onto the tripod and place it on a flat surface.
Attach the gimbal onto the tripod and place it on a flat surface. The surface must be flat, otherwise the calibration will be affected.
Place the phone into the holder. Please note that the tilt motor should be on the right side.
Move the mobile phone leftwards or rightwards until it keeps level.
Turn on the Bluetooth; Unlock screen portrait orientation mode; Launch the MOZA Genie App.
Click the Bluetooth icon; Connect the device.
Now, the MOZA Mini-S gimbal is ready for calibration.
Tap the setting icon to enter the setting interface; Click "Calibrate" to start the calibration.
Click “Confirm” to enter the calibration interface.

If there is no abnormal situation with the gimbal, please carefully decide whether to calibrate the gimbal.
Click the icon on the top right to enter the advanced calibration interface. There are two ways of advanced calibration: Default calibration and Custom calibration. Select “Default Calibration”.
Stand the gimbal on a flat surface according to the on-screen instruction. Make sure the pan arm is aligned with the front of the handle.
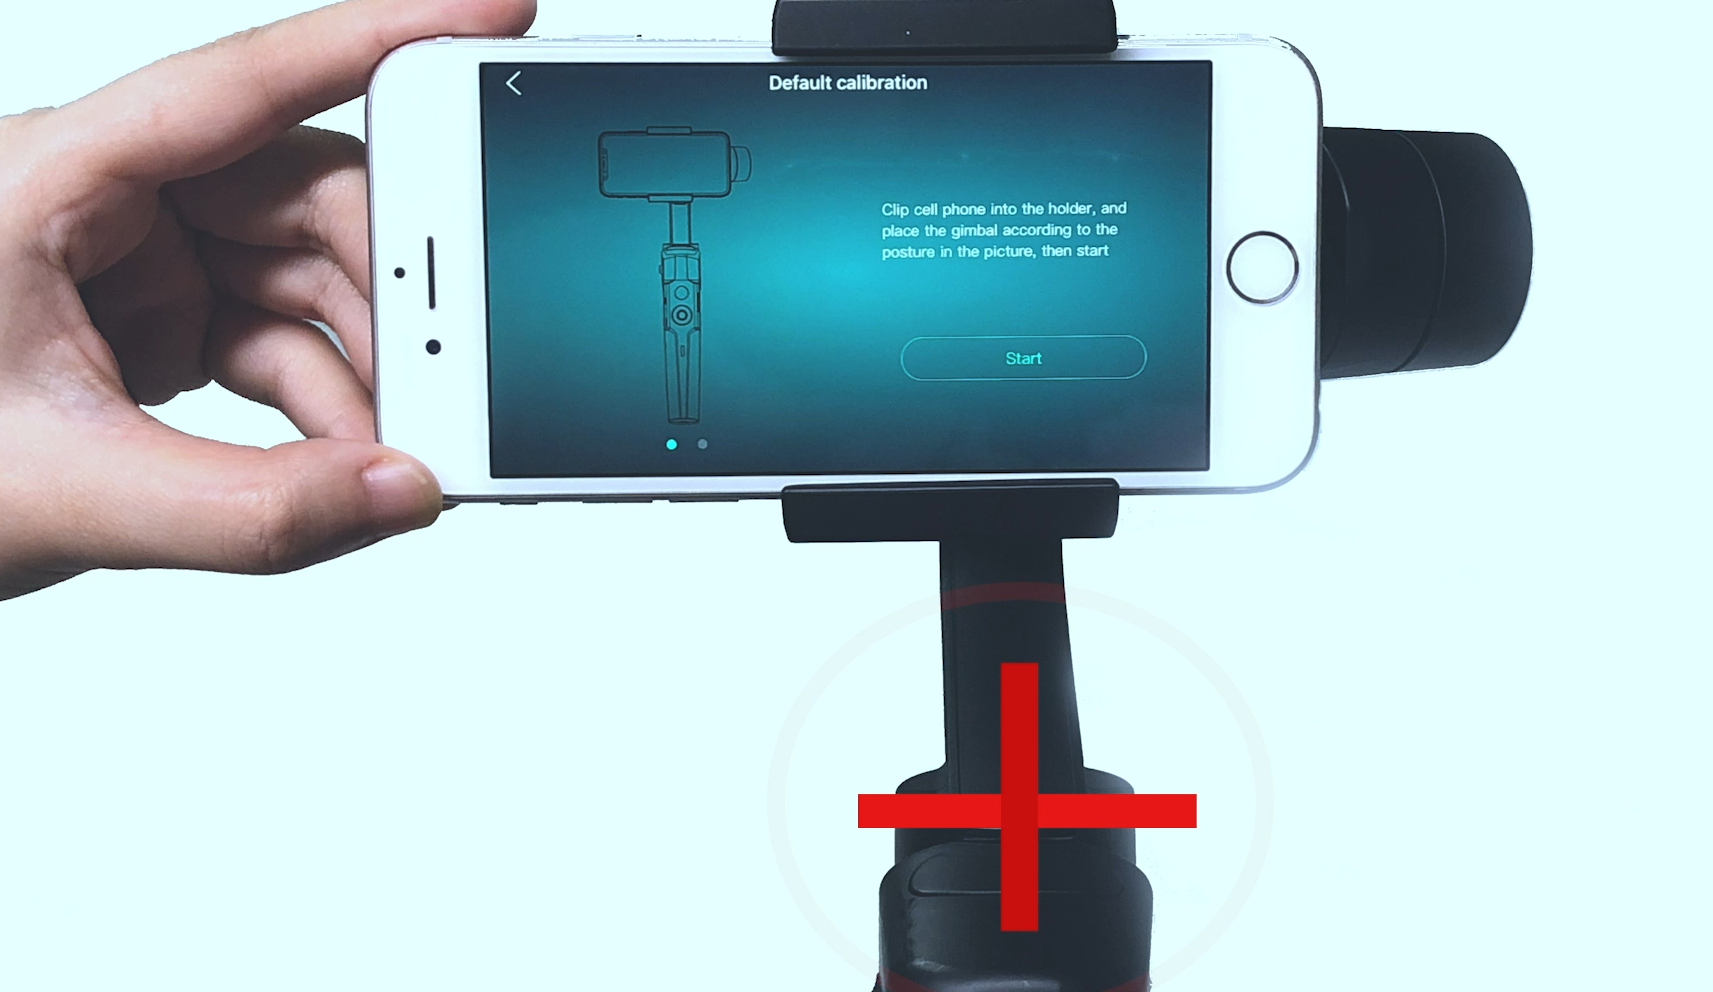
For some smartphones, the tilt arm is not able to be balanced. This won’t affect the actual calibration, just hold the phone with hand to keep the tilt arm level.
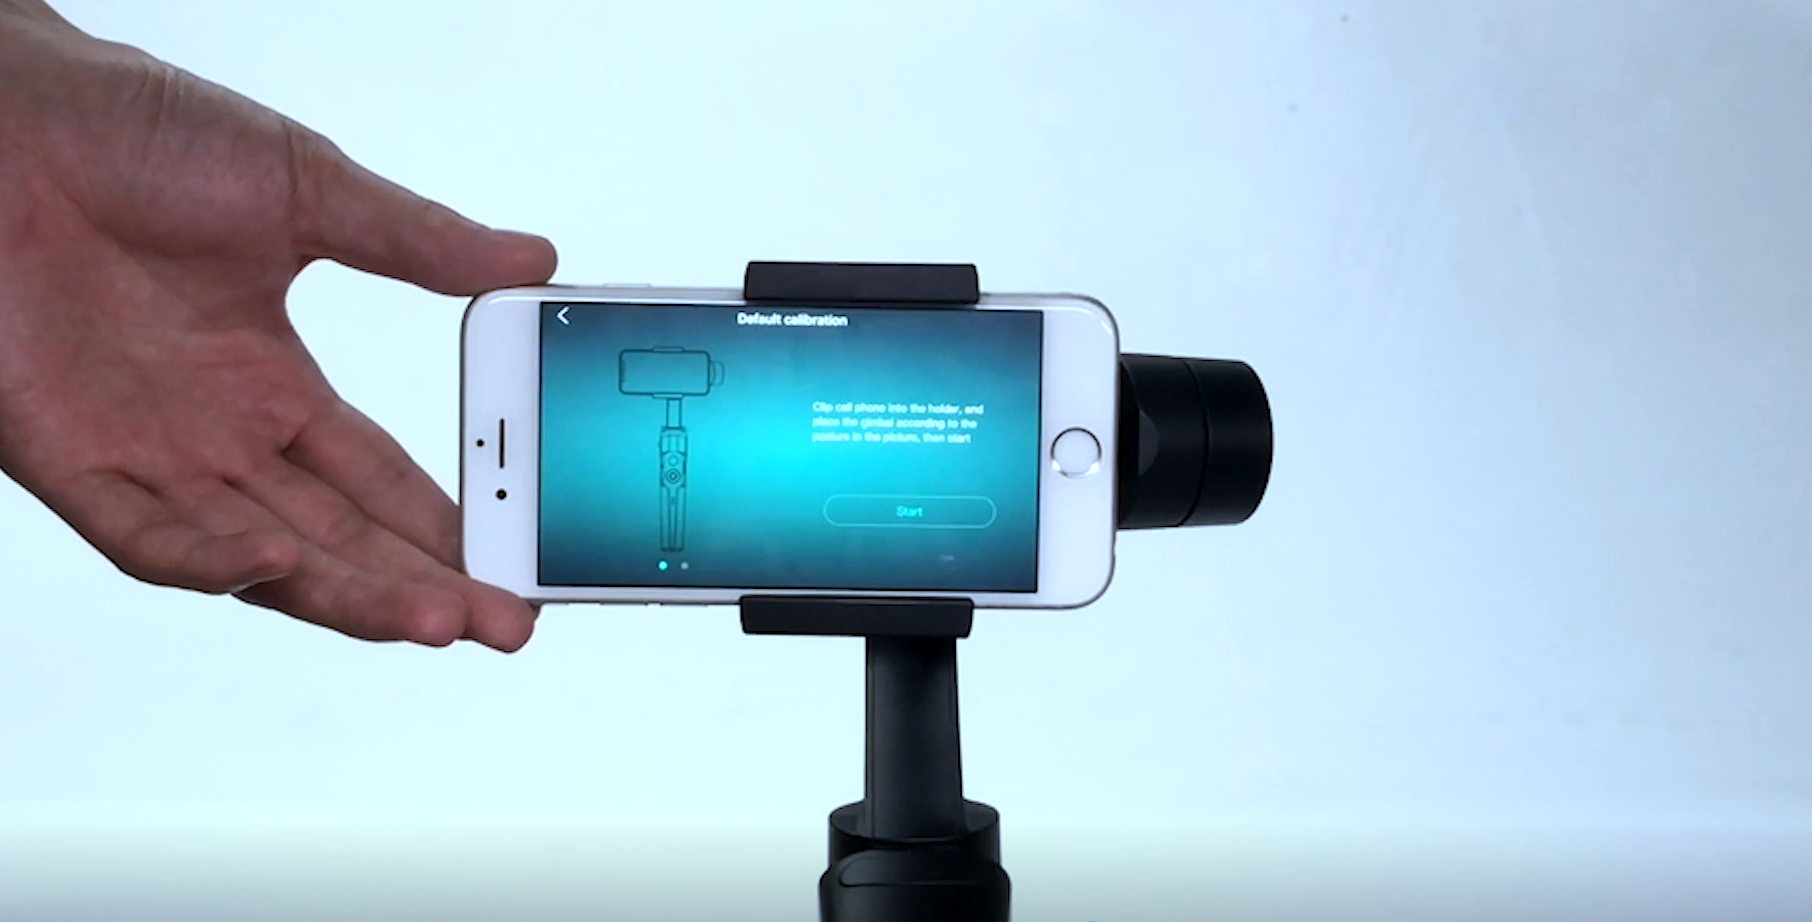
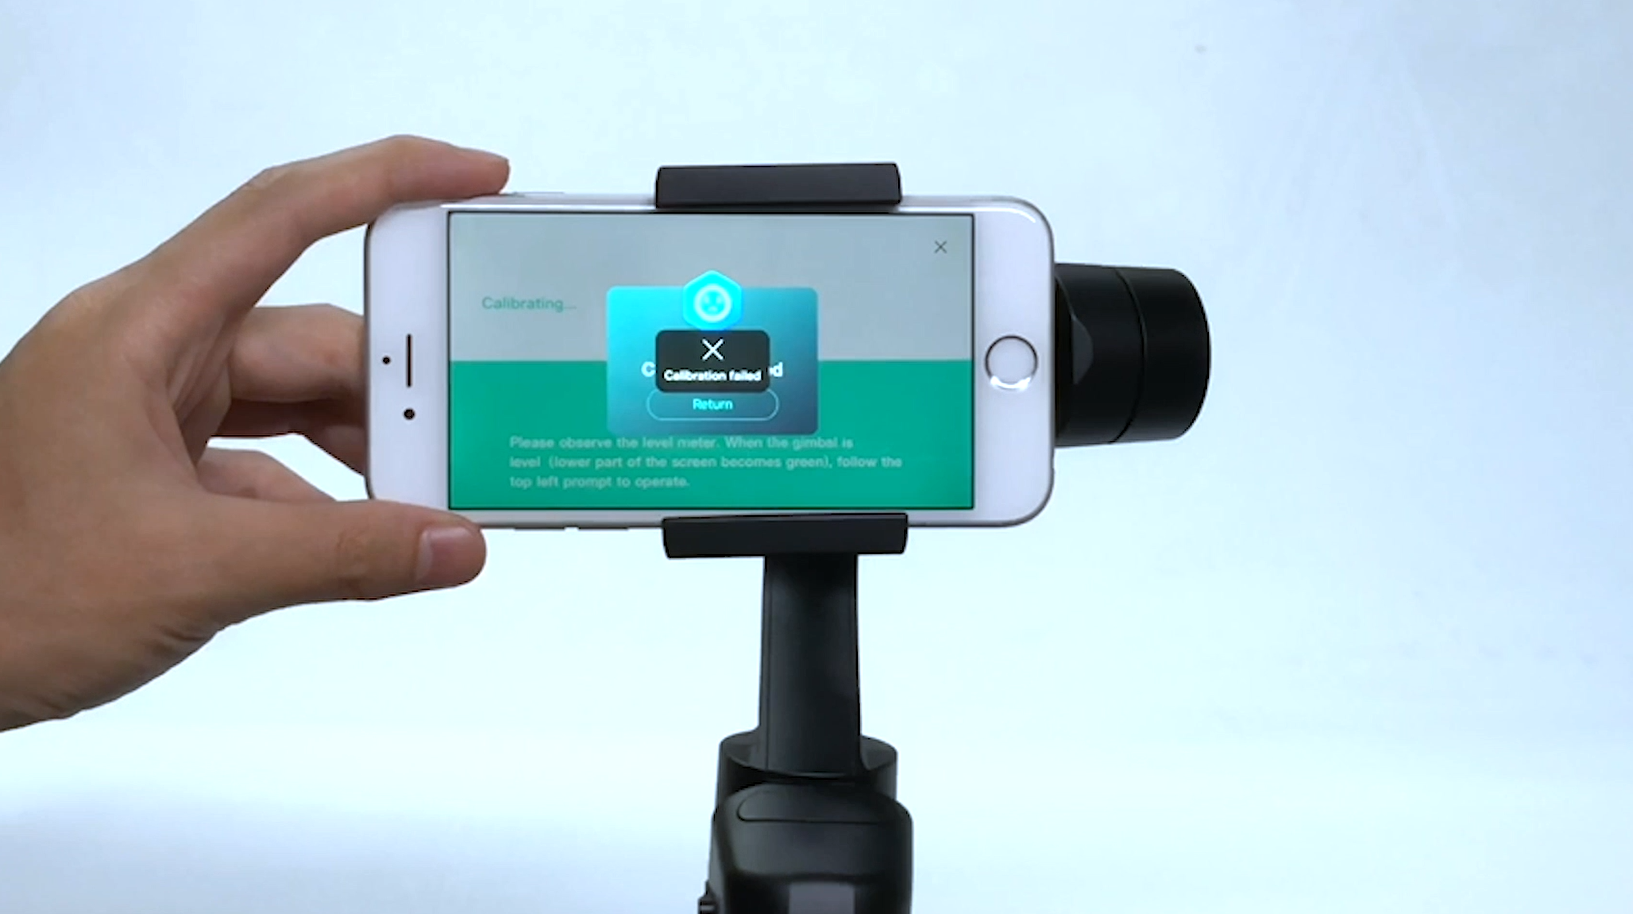
Click "Start" to begin the calibration. Hold the smartphone, and make sure the phone screen is facing the operator.
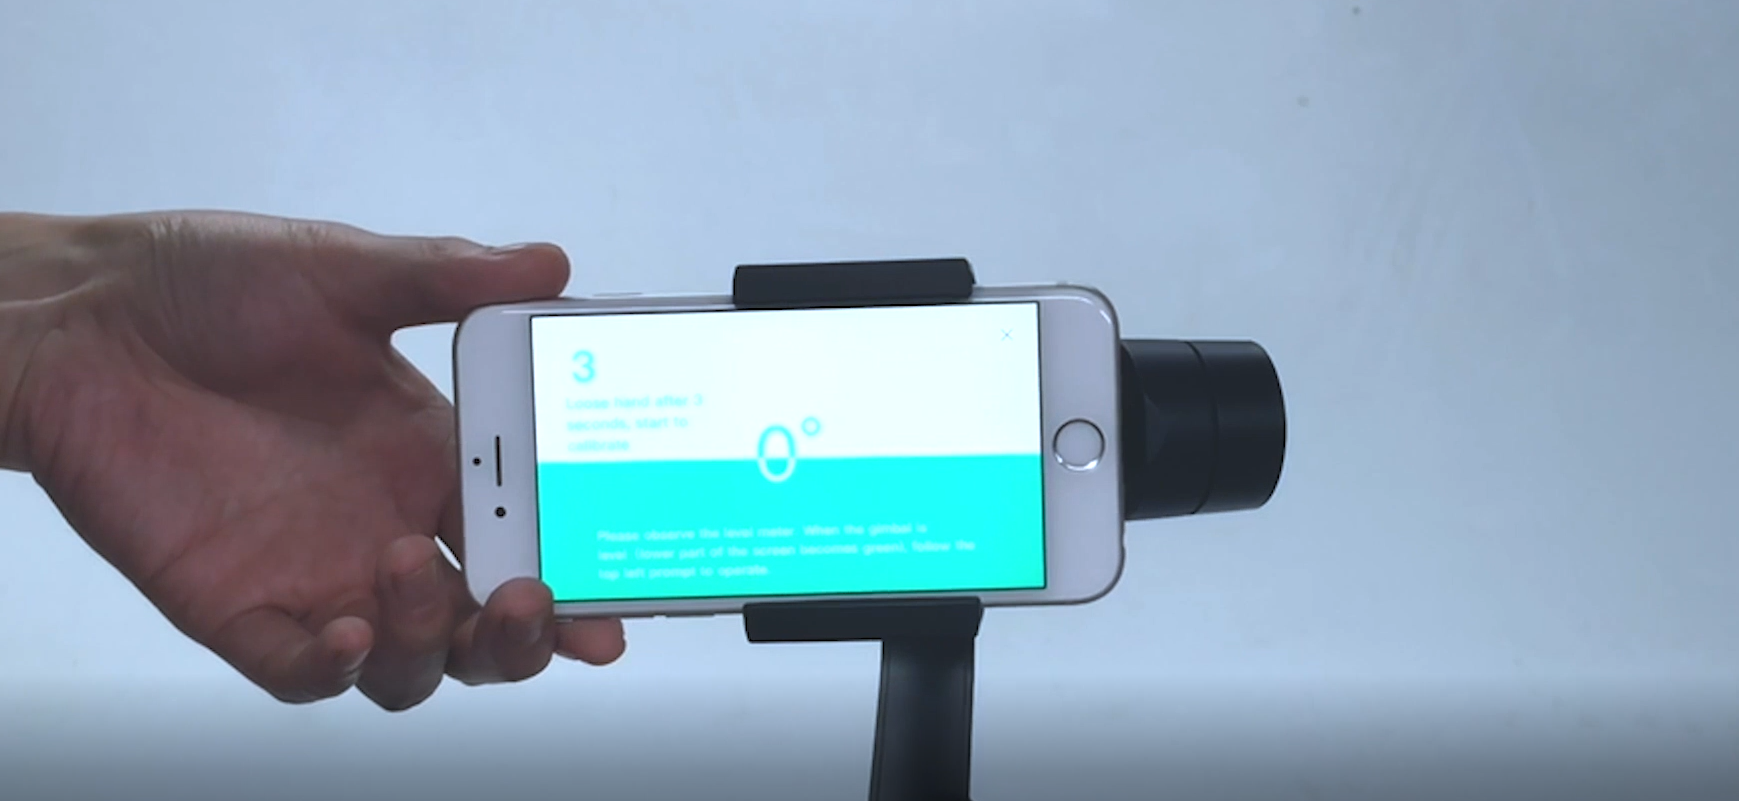
Turn the phone gently until the lower part becomes green, release the phone when the countdown starts.
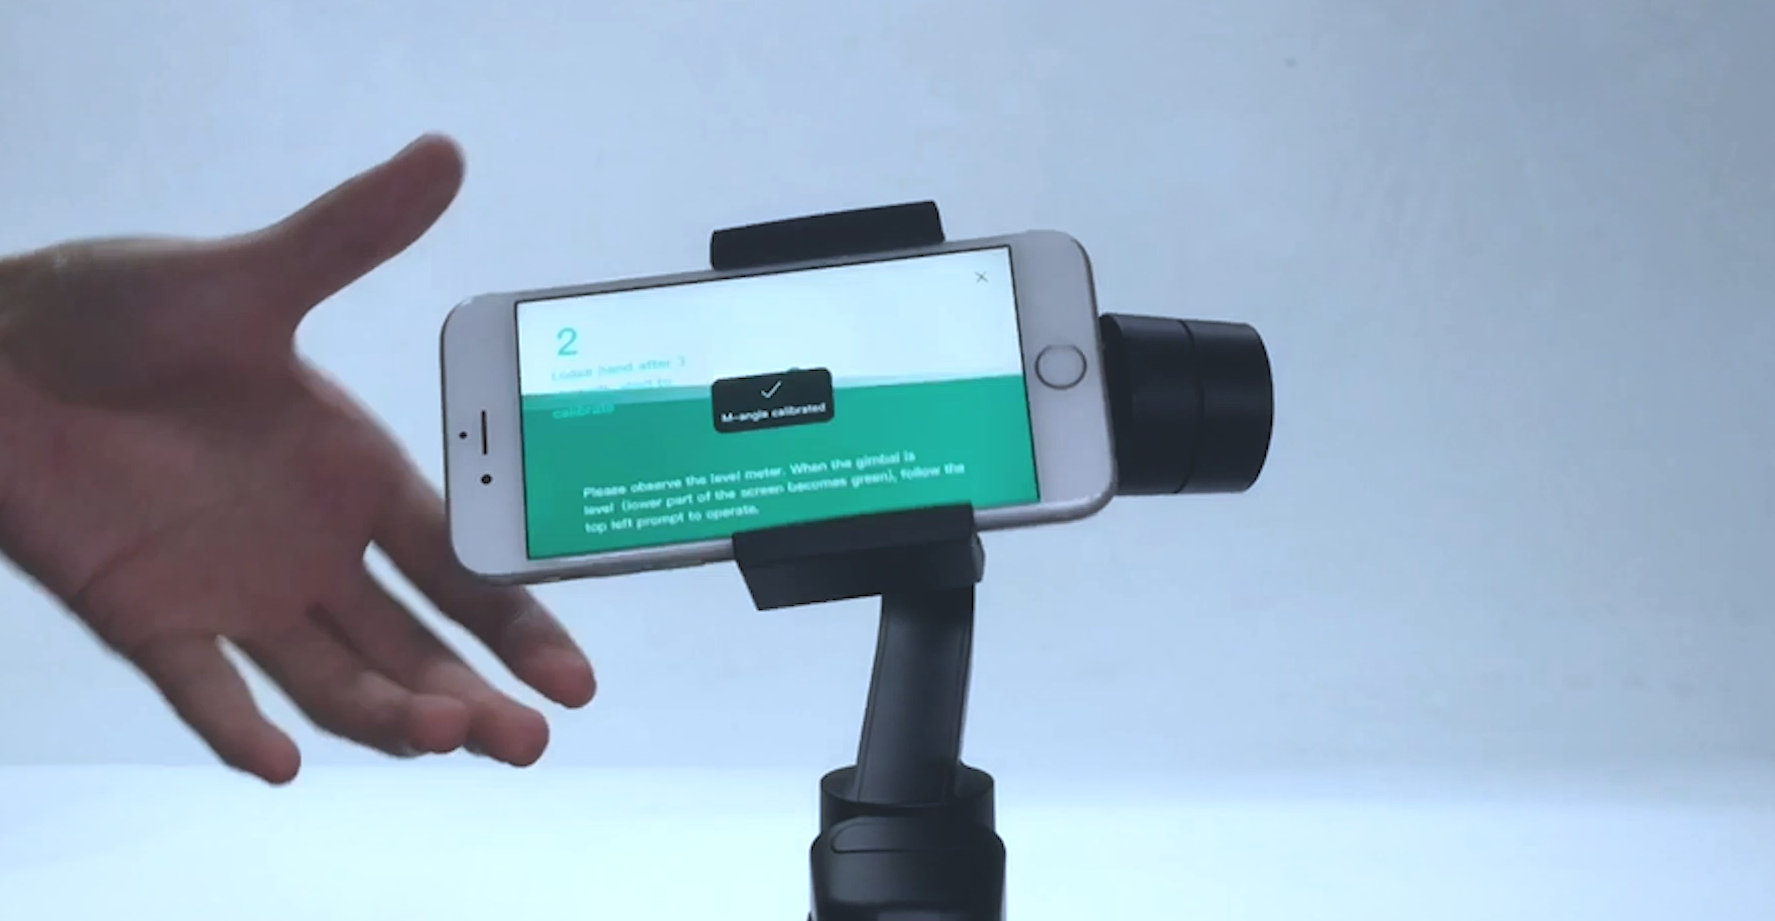
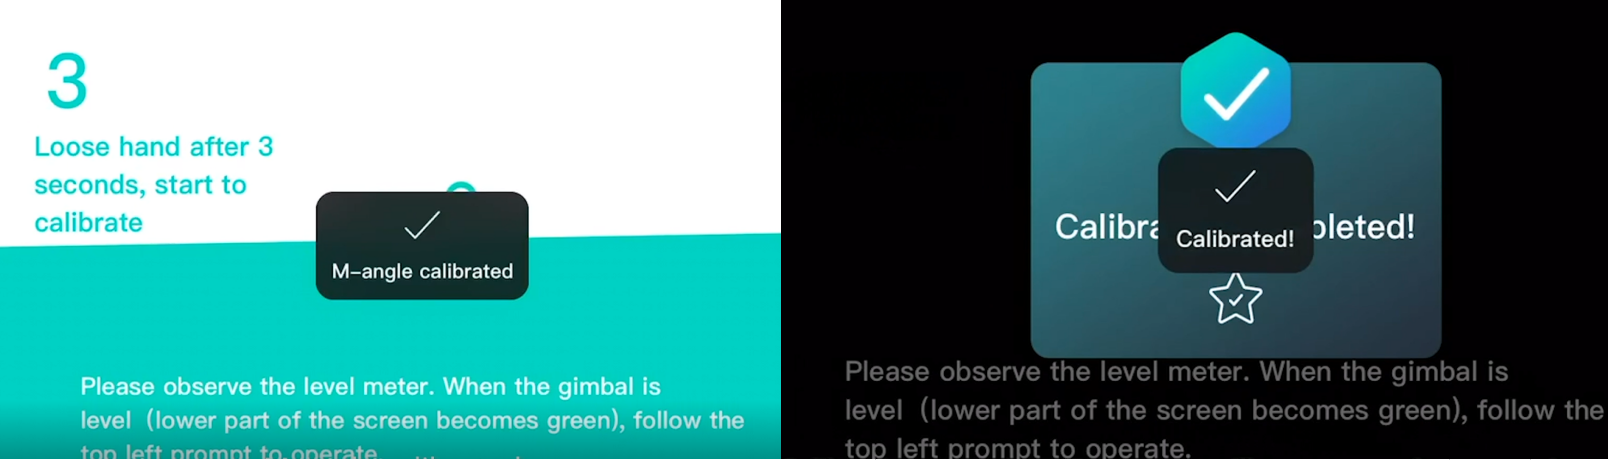
For iOS phones, “M-angle calibrated”, “Calibration completed” prompts will appear on the screen in sequence.
For Android phones, “Calibrate the electrical angle”, “Calibration is successful” will appear on the screen.
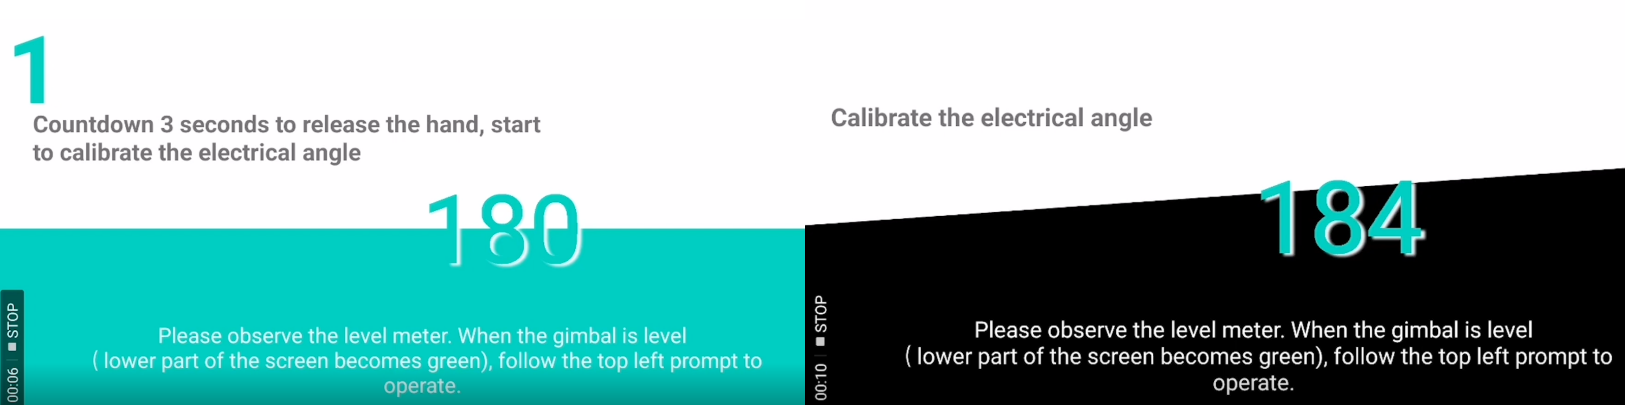
Please note that the operator must release the phone when the countdown starts, otherwise the calibration will fail.
Restart the gimbal and observe if there is anything abnormal. If there is slight drift, please start the primary calibration again.


 Language

